How to install a wooden picket fence yourself
 The wooden fence is still the most popular fence for summer cottages and private houses. Natural or painted wood always looks organic in nature, and the picket fence, which is usually used for construction, is inexpensive and does not require special equipment for transportation. And the best part is that a wooden fence is easy to install with your own hands, using a hammer and nails. Of course, if you have already installed the pillars by that time. However, first things first.
Preparatory work
 It is advisable to concrete the posts so that the entire fence stands exactly under any loads - strong winds, snowfalls. For concreting one column, 2-3 buckets of concrete solution are consumed. The solution for filling the columns is prepared in the following proportions:
- 1 h. Cement of quality not less than M400;
- 2 hours of river sand without additional impurities;
- 4 hours of crushed stone.
Water is taken at the rate of half of the cement.
All ingredients must be clean and free of debris, soil particles or clay. If it is colder than 15 ° С outside, the water for preparing the solution must be heated to 50 ° С.
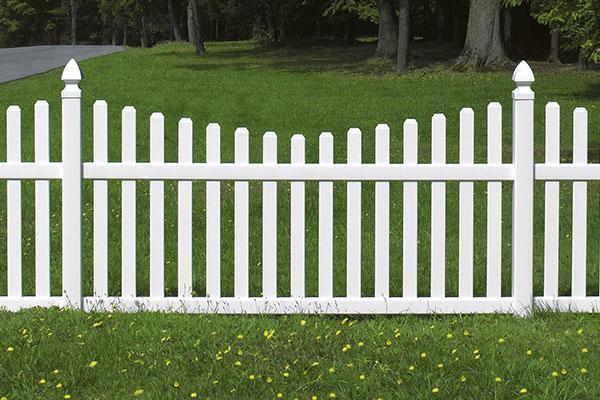
Logs are ordinary hardwood beams. The picket fence is attached to them with self-tapping screws or ordinary nails. The number of pickets in one section of the fence can be varied. Fences between areas are usually made less frequently, and from the outside they are practically deaf. Fence from a wooden picket fence does not have to be of a standard look, when vertical planks are stuffed onto the transverse logs. It is easy to turn a boring hedge into a work of art using stencils and your own imagination. See what decoration of the site turned out from an ordinary wooden fence:
After calculating the amount of materials, you should prepare tools: a shovel, a drill, devices for mixing concrete, a wheelbarrow for removing soil, a tape measure, a long twine.
The last stages in the preparatory work will be the clearing of the place. Remove the old fence, mow the grass and, if necessary, level any unevenness in the ground. At the extreme points of the site, pegs are driven in and twine is pulled between them. It will show a straight line along which the future fence will line up. Then, using a tape measure, mark the places under the posts with pegs.
The spacing between the pegs should match the length of the veins you purchased.
Installation of posts
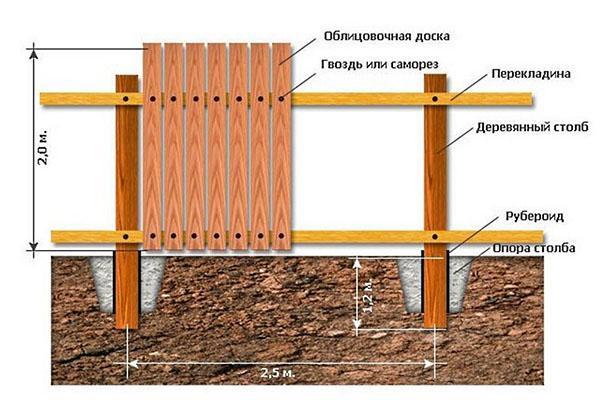
If you plan to put up a temporary fence, you can do without pouring the foundation under the pillars. In this case, the lower part of the wooden log is coated with any antiseptic - waste machine oil, paint, drying oil, wrapped with roofing material and simply dug in. Such a column in dry, non-porous soil will stand for several years. In other cases, the pillars are concreted so that the lopsided fence does not have to be corrected every 3-4 years. The process of pouring the pillars is simple, but will require adherence to the sequence of actions and the participation of at least two people.
- At the marked place, a hole is drilled with a depth of at least 0.5 m.
- The bottom is rammed, a layer of rubble is poured and again rammed.
- Then a little water is poured into the pit and a column is placed, aligning it strictly vertically. Concrete is poured, and the position of the post is checked again. Water is needed here so that the soil does not take moisture from the solution, otherwise the foundation will be fragile. To fix the column, props are used, since the concrete hardens within a few days. To speed up the process, special modifiers are added to the solution.
- If a pillar is concreted from a metal profile, a plug is placed in the upper part, which prevents moisture and debris from getting inside. A wooden log is cut so that the top is pointed, then the water will quickly slide down, not absorbing into the tree.
If the pillar is laid out of bricks, a kind of roof is made over the upper row of a thick mixture of cement, sand and water so that water does not stagnate in this place.
Processing of wooden parts
While the concrete is hardening, it's time to start treating the wooden parts to protect it from bugs, mold and other natural factors. The protective coating can increase the service life of wood several times.
Purchased lumber should be inspected and cleaned of bark residues, as it quickly starts up under it bark beetle... It is advisable to stitch all wooden parts. Planed wood absorbs less moisture. If it is difficult to cut everything, at least the lags should be processed. It is desirable to saw off the upper ends of the picket fence at an angle. In this form, they will last longer.
Lovers of unpainted wood should treat the picket and logs with a special impregnation. It retains its natural color and texture, but protects against fire and bugs. If desired, an impregnation is selected that imparts noble shades to inexpensive wood. So, ordinary pine can be tinted under oak, ash, walnut or ebony. On sale there is a large assortment of ready-made impregnations of all well-known firms "Belinka", "Pinoteks", "Neomid".
If a fence made of wood is planned to be painted, it is first primed and then covered with facade paint for wood.
Acrylic compounds are extremely easy to use and reliable. They do not smell, are diluted with water, tinted in any shade, and dry quickly. They also use oil and alkyd paints.
Assembling the fence section
First, lags are attached to the posts. They are nailed to a tree, and fasteners are pre-welded to a metal pipe or profile. The lags are aligned horizontally. Then pickets are nailed to them with nails or screws. In order not to measure the distance between the plates each time, templates are used - one is placed on the upper vein, and the second on the bottom. First, the extreme planks are nailed, then a rope is pulled between them and the height is adjusted along it. For narrow strips, one nail at the top and bottom is enough, for wide ones, two are used.
There is another option for mounting a picket fence. Individual sections are assembled on a workbench or directly on the ground, then the finished section is nailed to the posts. This option is faster, and the very busy can be advised to buy a ready-made section for a wooden fence.
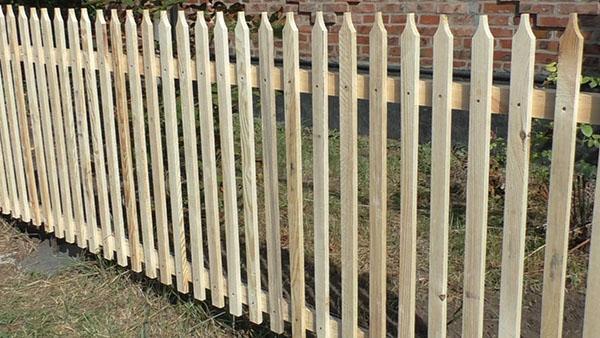
Unedged fence
What an unedged board is is already clear from its name. These are planks with uncut, uneven edges on which bark can remain. Unedged board can be of different types - slab, semi-edged, quarter. Such lumber is much cheaper than edged board, but from it, showing imagination, they create sturdy unusual structures.
A fence made of unedged boards is most often not leveled, cutting off all the irregularities, but leaving them to obtain a natural effect. An unedged board is heavier than a picket fence, so it is nailed horizontally directly to the posts.