Do-it-yourself high-quality doors for a sliding wardrobe from A to Z
Any furniture carpenter will tell you that the most difficult element in making sliding storage systems yourself is doors. Nevertheless, you should not give up making furniture at home. At specialized points of sale, you can always very inexpensively purchase ready-made sets of sliding systems and other accessories, which will allow you to easily assemble doors for a sliding wardrobe with your own hands. The most important thing is to have a desire to create, know the theoretical basis and strictly follow the sequence of actions.
Determining the size
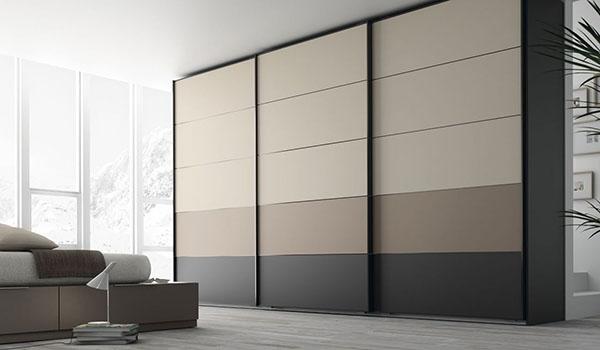
A characteristic feature of all "coupe" systems is the presence of sliding doors in the structure, moving along guides along the doorway. This design combines practicality, a very good design and a solid economy of free space. At its core, any cabinet belongs to the class of cabinet furniture. It is incorrect to refer a “compartment” to this group, because this item may not have a body at all. Sliding systems can be installed in a niche, fence off the end of the room, forming a separate space for dressing room, pantry or cabinet.
Assembling the doors of a wardrobe compartment with your own hands, usually, begins with determining the dimensions of the doors. This stage is necessary to determine the required number of profiles. In modern furniture production, the dimensions and number of sliding doors for storage systems are not standardized.
Based on the complexity of the execution and operating experience, experts recommend using the following parameters:
- The optimal door width is from 500 to 1000 mm. It is possible to make the width less than 50 cm, but you should be prepared for a possible differential swing of the door when moving. A sash with a width of more than 1 m turns out to be very heavy, which makes it inconvenient in everyday use.
- The height of the door leaf can be any. However, here you should take into account the standard profile length of 5.5 m. As practice has shown, it is not advisable to make sliding doors for the cabinet with your own hands above 2.5 m, especially in conditions of the ceiling height of classic domestic high-rise buildings.
The last parameter that should be given a little attention is the number of sliding doors that will be equipped with the cabinet of the "Coupe" system. Experts recommend starting from the width of the opening, the chosen optimal value of the width of the flaps and the design of the filling.
Types of sliding systems
Today, the most common two design solutions for sliding systems:
- Roller.
- Suspended.
Roller systems are equipped with a frame made of a profile that gives rigidity to the sash structure. Thanks to the lower wheels moving along the guide, the door is moved.
Depending on the number of flaps, the lower rail can have one or more tracks. The upper casters are selected according to the profile type. For an open profile, asymmetric ones are needed; for closed - symmetrical casters.

In overhead systems, the doors of the sliding wardrobe with upper rollers are fastened to the upper track, which can be made in the form of a rail or a pipe.
Wheels that are fixed on the door leaf move along the track. With this design, the entire load of the sash weight is taken over by the upper wheels.A guide can be installed in the lower part of the door leaf to prevent the door swinging. Some structures do not have lower guides, while the canvas "hovers" above the floor.
Fittings and components
A standard roller kit for creating sliding doors for a wardrobe with your own hands includes:
- sash framing profiles;
- top and bottom guides;
- rollers that are selected depending on the selected type of sliding system, profile shape, dimensions;
- fittings;
- filling the door leaf.
Let's consider the components in more detail.
Profiles
The sash frame for the sliding wardrobe is made from specialized profiles.
There are several main types of profiles:
- Vertical profile handle.
- Horizontal bottom.
- Horizontal top.
For the manufacture of profiles use:
- Steel. Stainless steel profiles are notable for their affordable cost, good reliability and impressive service life.
- Aluminum. Anodized aluminum profiles are characterized by low weight, good strength, and long service life.
How to choose the right profile for making a wardrobe on your own is described in detail in the video:
Guides
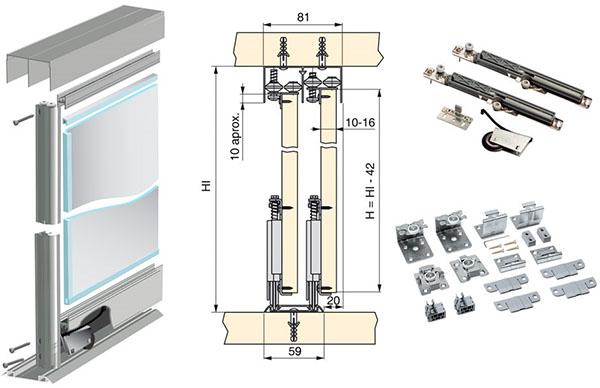
For the manufacture of a compartment cabinet, guides are required. The upper one is a profile with one or several tracks along which the upper wheels of each sash move.
The width of the top rail for the wardrobe is determined by the number of tracks and design features. The standard track width is 38.5 mm. Wall thickness - 1.6 mm.
The bottom rail is a profile with tracks for moving the support wheels.
The dimensions of the sliding wardrobes are taken from the Aristo sliding systems specification. When calculating, use the parameters of the profiles you are using.
Rollers and accessories
When using closed-type vertical elements in the frame, upper symmetrical rollers are used.
Each door requires a set of two rollers.
Asymmetric castors are used to create the frame of a sliding wardrobe sliding system from open-type post elements.
As in the previous version, two rollers must be installed on each door leaf.
The lower support wheels are responsible for the movement of the door and take most of the loads.
The roller is equipped with an adjusting screw and a pressure spring. This element is installed in the lower horizontal profile. A set of two rollers is required for each door.
What other do-it-yourself fittings for a sliding wardrobe are needed:
- A spring-loaded stopper that secures the sash in the closed state. Fits into the bottom rail.
- Schlegel - a strip of fleecy material that softens the impact of the sash against the walls of the case. It is glued into the groove of the vertical profile along the entire door height.
- Self-tapping assembly screw for hexagon. The number of screws is determined by the number of assemblies.
On request, furniture stores offer additional (optional) elements: door closers, end caps for profiles, magnetic stoppers, etc.
It is important to understand that these elements significantly improve the operational properties of the structure and significantly increase its cost.
Sash frame filling
Do-it-yourself sliding doors for a cabinet are made from a wide variety of materials that are suitable for the thickness of the profile. The most common and inexpensive are laminated chipboard and MDF boards, 10 mm thick. Such a thickness of the compartment doors is due to the profile width of 12 mm, plus a silicone seal, the thickness of each wall of which is 1 mm.
It is possible to make a prefabricated structure from a combination of two materials: mirrors (glass) and laminated chipboard. In this case, it is necessary to provide for the acquisition of a docking H-shaped profile with fixation.
The docking profile will significantly increase the rigidity of the frame when using several fragments of the sash filling.
Making calculations
Making calculations is the most important stage in the independent creation of sliding doors of any storage system. Precision is essential for the preparation of the leaf elements. Let's consider the procedure for carrying out calculations for Aristo profiles.
The calculations are carried out in the following order:
- Carrying out measurements of the doorway, the result of which will be obtaining the values of the height (hereinafter Нп) and width (hereinafter Lп).
- Calculation of the height of vertical profiles (hereinafter HB). So: Нв = Нп-40 mm.
- Calculation of the length of the upper and lower guides. Their parameters are equal to Lp (opening width). If you plan to install a stop, regardless of its type, the length of the guides should be reduced by 3 mm.
- Sash width calculations (hereinafter Lc). This parameter depends on the number of valves, the type of vertical profile, and the presence of a shegel. For a better understanding of the calculation procedure, we offer a table of ratios.
- The calculation of the insert width (hereinafter Lz) depends on the type of profile and material thickness. To simplify the calculations, we suggest that you familiarize yourself with the table.
- The calculation of the height of the door insert depends on the number of fragments and the thickness of the filling material. We suggest using the formulas given in the table.
The last stage of the calculations is the calculation of horizontal profiles.
Knowing the required sash width, you can easily calculate the length of horizontal elements using the formula:
- for an open-type vertical profile (C), this is the sash width (Lс) - 52 mm;
- for elements of a closed type (H), this is the sash width minus 70 mm.
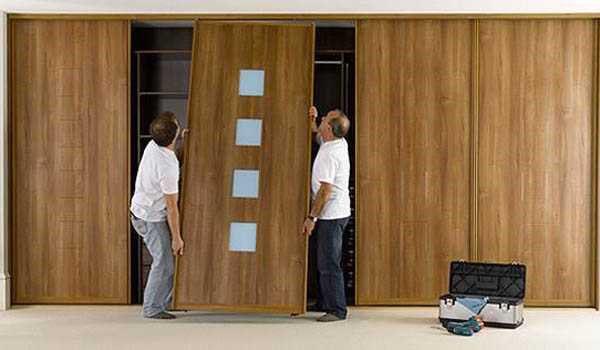
We assemble the doors for the wardrobe with our own hands
First, we create a drawing (in extreme cases, a sketch with dimensions is suitable). For a better understanding of the process, we propose to carefully study the assembly diagram of the wardrobe sash, made on the basis of the sliding system and Aristo elements.
Consider the stages of assembling a door for a sliding wardrobe with your own hands:
- The top and bottom rails should be fixed to the cover and base of the structure using a plumb bob or laser level. The minimum distance of the rails from the shelves is 100 mm.
- We assemble the frame: using assembly screws, you should connect the horizontal and vertical profiles of the door leaf, installing the prepared door filling material between them.
- Place the upper rollers under the head of the assembly screw on the two upper assemblies.
After assembling the frame, we mount the lower rollers on the regular place. How to install videos on closet? Very simple. Insert the end of the clamping spring into the groove, press the roller until it stops and fix it with a screw. Perform a similar operation on both sides of the sash. The sliding wardrobe rollers are adjusted by tightening or loosening the fixing screw. To limit the travel of the leaves, a locking spring must be inserted into each track of the lower guide. The last operation before installing the sash in its original place is fixing in the grooves of the Schlegel profile. It is very simple to do this, since the seal is made on a self-adhesive basis. To complete the picture, we recommend watching the video of assembling the doors of the sliding wardrobe with your own hands: