Laminate on the wall - rules and cladding options
 Laminate on the wall is a modern design solution for cladding the interior of a room. The right floor covering will diversify the interior and add style and creativity to it. And high-quality fixed panels will delight the owners for a long time with their appearance. How to choose a laminate and mount it on the wall?
Advantages and disadvantages of laminate flooring
Laminate wall decoration has established itself as a high-quality and durable cladding. But laminate flooring also has its strengths and weaknesses. Before purchasing it, you need to familiarize yourself with the pros and cons of laminate cladding.
Advantages:
- Material availability. Compared to parquet or natural wood, wall laminate is inexpensive and a budget option. And its large selection in hardware stores allows you to choose any color scheme among the existing manufacturers and in different price categories.
- Multifunctionality. The room visually enlarges with a laminate or it is divided into several zones, the main wall stands out, the section of the wall above the bed or behind the TV is creatively decorated.
- Practicality. The material does not require careful and constant maintenance, and is also durable.
- Sound and thermal insulation properties. Thanks to the laminate coating, sound and heat insulation is increased.
- Environmental friendliness. Laminate is made from wood that has been crushed into dust. It is safe for the environment (no harmful elements evaporate) and human health (no allergies are caused).
- Wall flaws are hidden. Any cracks, chips, irregularities will hide behind the laminate.
Disadvantages:
- Exposure to external factors. Due to the prolonged influence of high humidity (in the kitchen or in the bathroom), high temperatures (from radiators, fireplaces, stoves), direct sunlight or physical influences, the attractive appearance of the laminate on the wall is lost and its service life is reduced.
- Narrow destination. One of the walls, a fragment of a wall, a niche or a column is faced with laminate.
Laminate covering the entire room looks ugly and inappropriate.
How to choose a laminate for wall cladding

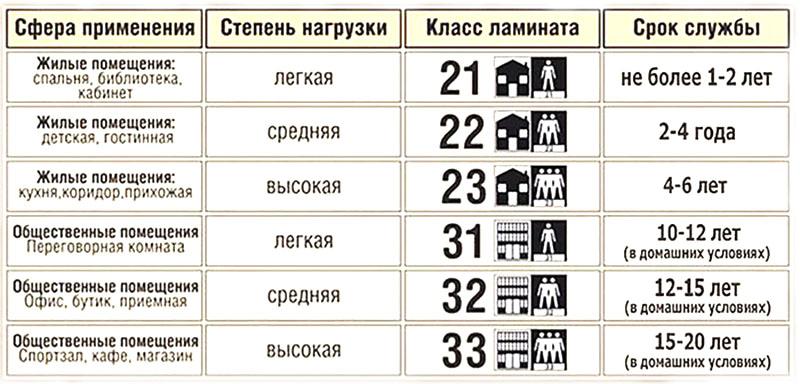
For a laminate that is laid on the floor, more overestimated requirements are put forward than for what will be on the wall. Therefore, the laminate on the wall may not have such a high strength class, because the load will be lower than on the floor covering.
Depending on the method of fixing the laminate to the wall, it is divided into 4 types:
- Glue - with smooth edges, without a lock. For the installation of such plates, an adhesive mixture, construction silicone or liquid nails are used.
- Sheet pile - glue is applied not to the joint between the plates, but from the seamy surface.
- Kleimerny - slabs are attached to the crate with clamps or small nails.
- Click - the panels are connected to each other at an angle of 20 ° using a lock (until a characteristic click).The laminate itself is attached to the crate with an adhesive solution.
Options for laying laminate on the wall
The imagination of designers and customers about how to lay the laminate on the wall is not limited. Even the smallest detail can make a room original and give it an unusual look.
Laminate is laid:
- Vertically. The tiles laid in this way visually enlarge the room and its area (if it is small and with low ceilings). For a large room, wide strips of laminate are used, and for a small room, narrow ones.

- Horizontally. This arrangement is suitable for small rooms, since their width visually increases and the room becomes more spacious. It is not recommended to use horizontal laying in rooms with low ceilings, otherwise the plates will visually make the space even smaller.

- With the displacement of the plates, the room visually expands or lengthens (depending on the direction of the stripes);


- Diagonal (not often used due to complex installation).

How is laminate flooring mounted on the wall
 If the laminate is mounted with glue or liquid nails, then the surface is pre-leveled with starting plaster. The plastered wall dries from 1 to 2 days. The wall is then primed to provide more adhesion of the surface to the panels.
 Laying the laminate on the wall always starts from the bottom from the left corner (according to the previously made markings). A solution or liquid nails are applied to the first tile and glued to the surface.
You should always read the instructions for the glue or liquid nails.
When using separate brands of glue, the tile is removed from the wall after the first gluing and the solution is weathered (10 minutes). For other brands, the adhesive mixture dries up if a break is taken after laying every 2-3 rows. Otherwise, the lower panels will shift under the weight of the upper ones.
 The second and subsequent panels are fixed in the same way as the first, and the flatness of the plane is checked with a level. A mallet (rubber mallet) is used to level the tiles.
 For offset or checkerboard effects, the second row always starts at half of the tile. It is shortened with a hacksaw for metal.
When laying the laminate, a gap (expansion joint) is always left between the panels and the floor (1-2 cm) in order to avoid unnecessary deformation of the material. Then the gap is covered with a plinth.
How is the laminate attached to the walls, if there is no desire to level the surface or you need to hide communications? For this, you can use a frame installation (metal or wood).
The first beam or profile is attached to the most protruding part of the wall. A measuring cord or fishing line is pulled from it and a second beacon is installed on the other side of the wall. All other bars or profiles are mounted at the level of these two starting points.
The frame is always fixed perpendicular to the direction of the laminate tile.
The laminate is fixed with construction silicone or liquid nails (if it is a metal profile) and with clamps or nails (if it is a wooden frame).
Reward for all efforts
Although the process of installing laminate flooring is not easy and requires concentration as well as effort, the reward for all the work is the unique and creative style of the room, which you are not ashamed to show your friends.
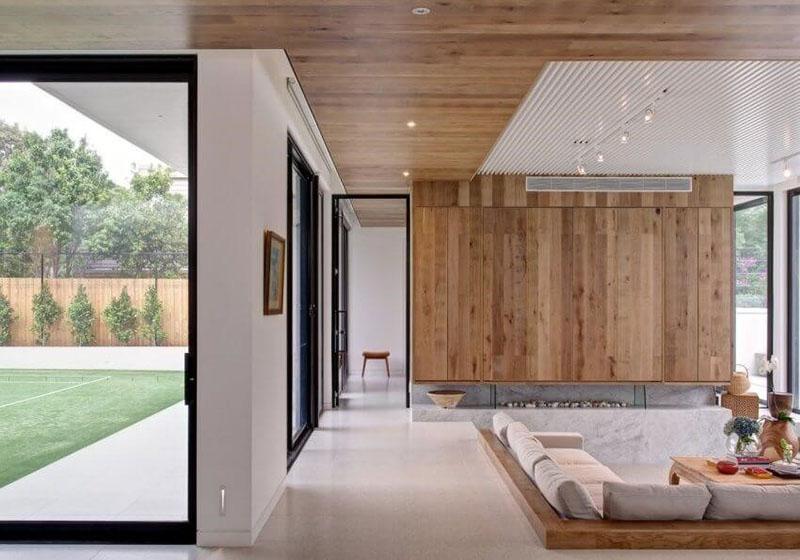
A photo of the laminate on the wall in the interior of different rooms is a vivid confirmation of this.


