DIY original hanger
The innate craving for creation and the considerable cost of furniture often push our compatriots to independently create some interior items. Indeed, what could be easier than making a hanger with your own hands, which will bring an atmosphere of comfort to the house and allow the owner to significantly save on the purchase of this piece of furniture.
Advantages and disadvantages
The hanger is an integral part of any hallway and dressing room... The dimensions of these visits do not always allow you to painlessly place a full-fledged wardrobe. A wall-mounted or compact floor-mounted homemade hanger for the hallway will be an excellent way out in such a situation.
A self-made construction does not require special carpentry skills, specialized tools and expensive materials from the creator. A very attractive and functional hanger can be made from what is left after renovation with the tools that any home craftsman has in his arsenal. An important advantage of a homemade hanger is its relatively low final cost, which, even when buying materials in the nearest building supermarket, will be several times lower than in furniture stores.
As for the design, the drawing of the clothes hanger can be easily downloaded from the Internet, since this service is available on specialized resources. You can go a simpler way: come up with a design and calculate the dimensions yourself. The main thing is to know the technology, the specifics of the materials used and the principles of finishing work.
Requirements for a homemade hanger
Despite the simplicity of the design, any do-it-yourself hanger takes on very serious loads. Based on the foregoing, the first requirement for this piece of furniture is reliability.
In addition, the hanger must:
- provide free access to clothing;
- have small weight and size parameters;
- be functional.
A do-it-yourself hanger in the hallway is the first to greet visitors. That is why, when creating on your own, in no case should we forget about the design, which should ideally fit into the interior of the room.
Hanger classification

Any hanger can be classified according to the following criteria:
- Installation method.
- The way the clothes are placed.
- Installation site.
- Functionality.
According to the installation method, hangers can be:
- wall-mounted;
- outdoor;
- ceiling.
Depending on the design, hangers are usually installed in:
- hallways and hallways;
- bathrooms;
- dressing rooms.
By the method of hanging clothes, hangers can be distinguished:
- with hooks;
- with a crossbar for "hangers".
A do-it-yourself wall hanger, as a rule, will be very compact and will not take up much useful space in the room. On the other hand, the trempel is suitable for any garment that does not deform during storage. The chosen type of this piece of furniture affects the design and the complexity of the creation of the entire structure.
The functionality of the hanger is provided by the presence of additional shelves for hats and shoes, stands for umbrellas, key holders. A do-it-yourself wall hanger that uses a combination of hooks and a hanger bar will fit in a hallway, bathroom, pantry or dressing room.Floor structures are most often installed in spacious hallways, bedrooms and halls.
Material selection
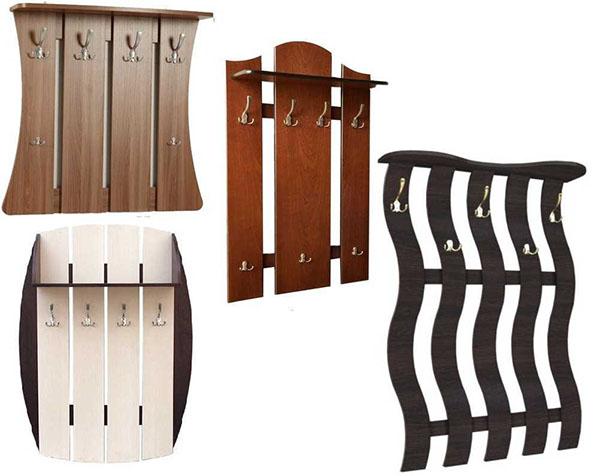
A few words about materials. For self-assembly, hangers most often use natural wood, chipboard, plywood and metal.
The most grateful material is solid wood:
- The tree is decorative, highly durable and environmentally friendly, perfectly tolerates mechanical loads and a wide variety of decorative coatings. However, before making a hanger out of wood, each piece must be thoroughly dried, sanded and treated with an antiseptic.
- Laminated chipboard is a very inexpensive material made from woodworking products. The advantages of laminated chipboard are weight: low cost, perfectly flat planes, a wide range of colors, minimal preparation (gluing of edges) of blanks before assembly. Among the shortcomings, it can be noted: moisture intolerance (cannot be installed in rooms with high humidity levels), low strength, possible release of phenol into the air (when using a low quality material).
- Plywood hangers are highly durable and lightweight. This is where the advantages end. The main disadvantage of the material is the complexity of finishing. Before varnishing, workpieces require putty, high-quality sanding, priming and staining. In addition, waterproof plywood, with a thickness of 18 mm or more, is very expensive and has an impressive mass.
- Metal is an excellent material for making a hanger, but only if the master owns his own locksmith's workshop or has the skills of artistic forging. The semi-antique hanger created by your own hands will become a true decoration of the house and the pride of the owner. The main rule: the product must fit perfectly into the style of the room.
Next, we will consider in detail several options for making a hanger that are most suitable for self-assembly.
Simple do-it-yourself chipboard hanger
Such a product can hardly be called a masterpiece of furniture production. But this design has its advantages:
- Low cost.
- Easy to manufacture.
- Small time investment.
When creating even such a hanger, there is always an opportunity to dream up and experiment with the design.
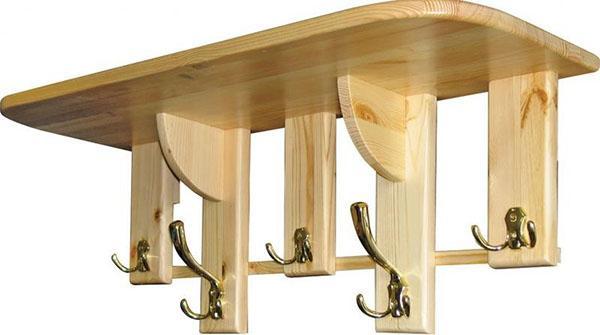
To make a clothes hanger with your own hands, you will need a 16 mm thick laminated chipboard blank. The length of the workpiece is selected based on the required number of hooks. The width should be at least twice the height of the hooks.
In addition to the plank, you will need hooks and fasteners, which can be used as ordinary wood screws. However, the self-tapping screw is not fixed in the chipboard in the best way. The best fixation rates in this material are shown by confirmations.
The distance between the hooks on the hanger is determined as follows: an indent of 5 cm is made from each edge. The extreme hooks are fixed at the marks. The rest are distributed evenly over the workpiece.
To fix the workpiece to the wall, you will need 2 canopies. If you do not intend to use a hanger for storing heavy winter clothing, then you can purchase conventional sheds with two attachment points. If the shelf has to withstand heavy loads, it is better to use reinforced hardware with three attachment points.
In this design, you can easily make your own hanger hooks. Instead of hooks, furniture handles will look very creative on a hanger. For hanger in garage you can use old, bent open-end wrenches as hooks. Curved forks and spoons can be installed on the kitchen towel rack instead of hooks.
If you complicate the design a little, you can make a combined hanger hanger with your own hands.This model is not much more complicated than the simplest chipboard hanger, but it is distinguished by solid functionality, since it provides for the presence of hooks, a crossbar for hanging trembles, and a compartment for storing hats.
To create such a structure, you will need to add sidewalls and a shelf cut from the remains of chipboard, wood or MDF to the finished structure. Between the shelves, in the front, a crossbar should be fixed, which is made from an ordinary shovel handle or a nickel-plated steel pipe.
DIY transformable hanger
A transforming hanger is a great idea for a small hallway. In "ready mode" the hanger resembles a shield and has no hooks. If necessary, they can be easily pulled out, and they are located in three rows.
Do-it-yourself transforming hanger is very simple. To make it you will need:
- 6 wooden slats 650x50x30 mm.
- Plywood, 16 mm thick.
- Tube (copper, aluminum, steel) outer diameter 10 mm.
- Plywood 10 mm 650x380 mm.
- Self-tapping screws, awnings.
- Acrylic paint or water-based varnish.
Of the tools you will need: a hammer, a drill with a 10 mm drill, a jigsaw, a curly screwdriver.
Stages of work:
- Using a jigsaw or a band saw (if available on the farm), 15 hooks are cut out of plywood.
- A hole with a diameter of 10 mm should be drilled in each workpiece. Thoroughly grind, prime and paint everything.
- From the tube, 15 fragments should be cut, 50 mm long.
- In the side of the rails, you need to mark and drill. Hole diameter 10 mm, depth 20 mm.
- Now, on one side of each rail, install pipe sections into the prepared holes.
- Hooks should be placed on the tubes as shown in the figure.
- It is necessary to close the hooks with the second strip. Repeat the process until the complete assembly of the transformable hanger.
The last step is to install a limiter on the back, which is a sheet of plywood with a thickness of 10 mm. With awnings, the hanger can be easily attached to the wall in the hallway.
Working with a power tool requires skills and strict adherence to safety precautions. If difficulties arise with the preparation of blanks, it is better to contact the professionals to complete this stage of the work.