DIY incubator from the refrigerator: two simple models plus a bonus - video about an automated incubator
 The incubator should heat up quickly and keep the temperature well, such as a refrigerator. Having slightly improved this technique and adjusted it to the desired parameters, you can easily make an incubator from the refrigerator with your own hands. First, old junk, which is a pity to throw away, will no longer clutter up the pantry. And secondly, it is financially profitable, because factory incubators cost a lot of money.
The simplest home incubator models can be horizontal or vertical. For beginners, the easiest way is to make a manual apparatus, in the sense that it is not automated. This means that the eggs in it will need to be turned over by ourselves. In addition, it is necessary to provide for the possibility of humidifying the air inside the refrigerator. Or also manually irrigate the masonry periodically.
DIY incubator from the refrigerator - horizontal model

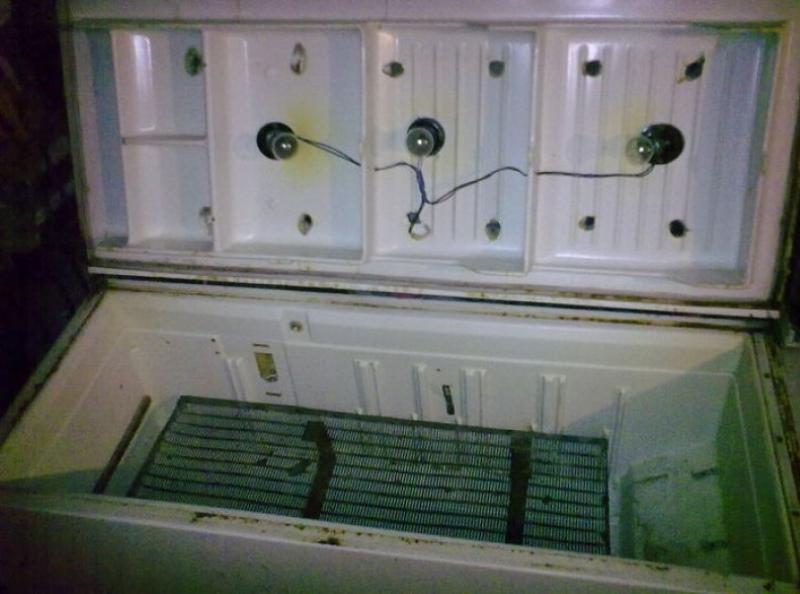
It will be enough 4 bulbs with a power of 100 watts.
Getting started:
- We cut out the ventilation hole in the door from above.
- From the outside of the door we attach thermostat on scotch tape.
- We put the temperature sensor inside using the vent.
- On the inside of the door we install plywood with bulb holders.
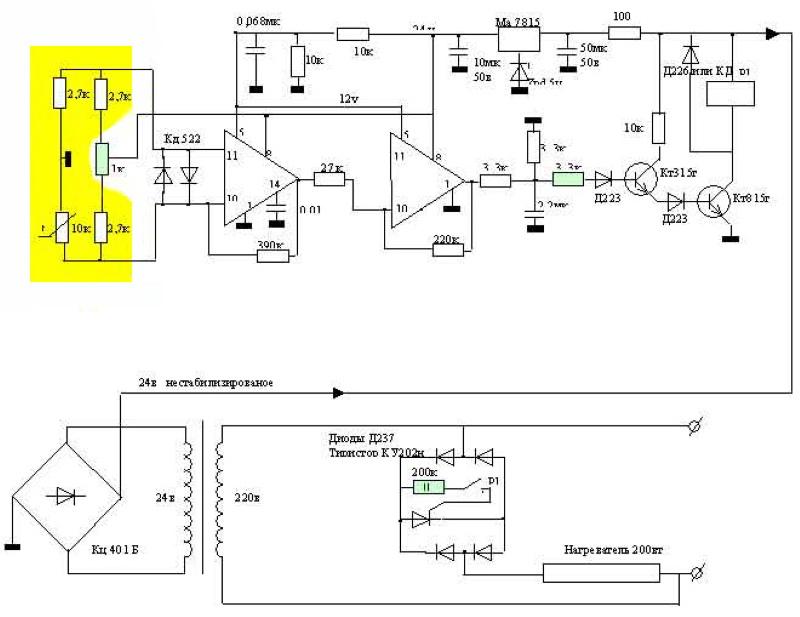
- We connect the thermostat according to the diagram below.

- At the very bottom, which used to be the back wall of the refrigerator, we put a container with water. It will humidify the air.
- The last one is to install the egg grate so that it does not touch the container with water.
How to make a vertical incubator with a fan
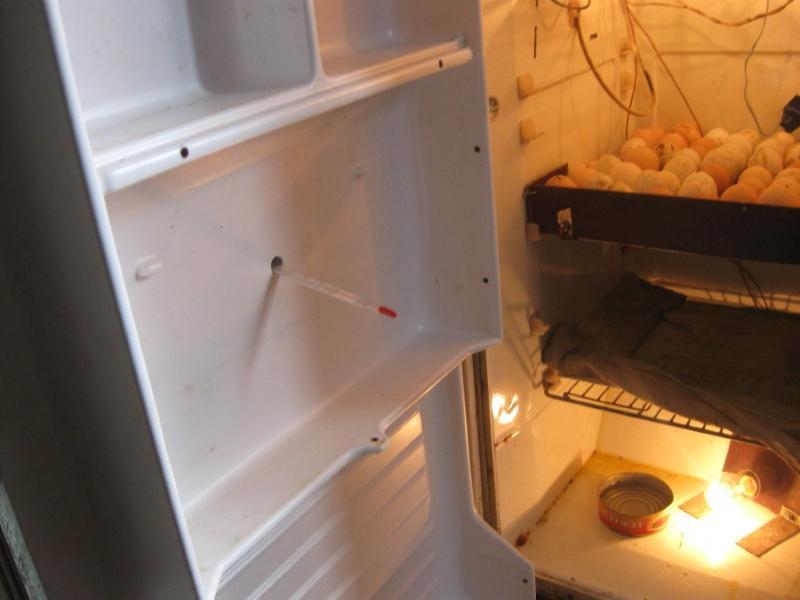
 This incubator will allow you to lay more eggs. It will be possible to put several trays in it. They will be attached to the grooves from the shelves. Or just in the side walls of the refrigerator with screws.
Step by step production:
- We take out the old shelves.
- We make 2 holes in the upper part of the case.
- We mount a thermostat and a thermometer in them.
- Install trays.
- We attach the fan motor to the rear inner wall.
- Install a tubular electric heater around the fan blades. This will help distribute heat throughout the refrigerator.
It remains to put a bowl on the bottom and pour water.