How to grow oyster mushrooms at home, recommendations and useful tips
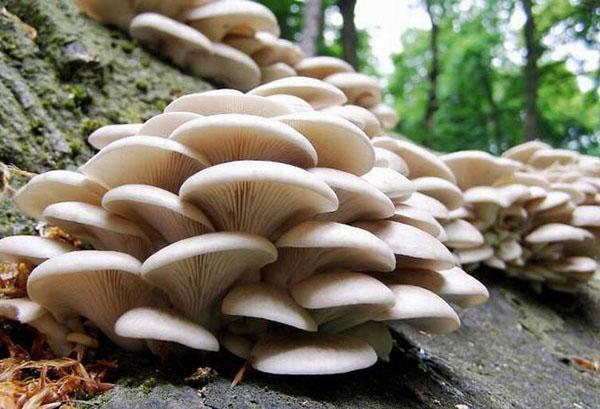
 Mushrooms have long since turned from forest dwellers into cultivated plants, so many gardeners want to learn how to grow oyster mushrooms at home. Why exactly oyster mushrooms? Because they are the most unpretentious and the most productive of the grown mushrooms. The yield of oyster mushrooms is about ten kg per square meter of area per month; they begin to collect them only one and a half months after planting. Therefore, it is with these mushrooms that you need to start.
How to grow oyster mushrooms at home, where to get mycelium

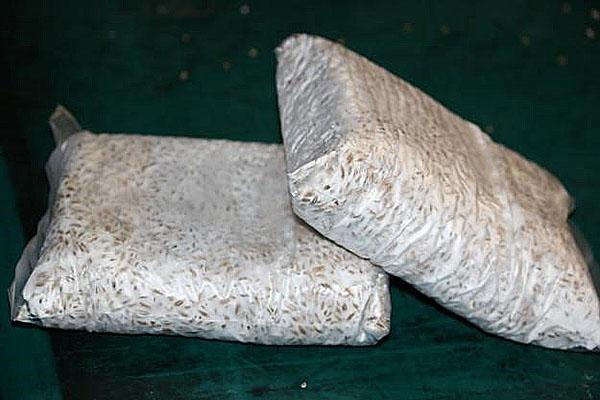
You should buy mycelium in specialized stores or from companies that grow these mushrooms. The second option is preferable, because professional mushroom growing companies are obliged to change mycelium every year, and they sell the used one. Such mycelium is much cheaper than a new one, although it is quite capable of reproducing fungi.
When purchasing mycelium, make sure that its color is white, small inclusions of the substrate are allowed. Only forest mushrooms can smell good mycelium. To begin with, it is enough to buy a kilogram of mycelium, it should be stored in the refrigerator.
 Buying ready-made mycelium, the gardener runs the risk of getting a low-quality product, and this will disrupt the whole enterprise. It makes sense to learn how to grow oyster mushroom mycelium yourself. This is done in this way:
- A fresh healthy mushroom is taken, cut in two and a piece of the cap is detached with tweezers.
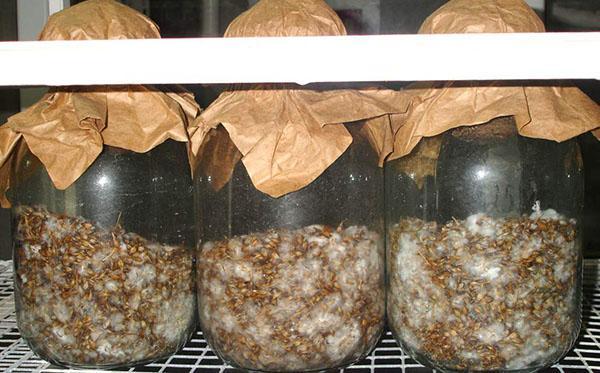
- This fragment is treated with hydrogen peroxide for disinfection and a test tube with crushed grains of millet or other substrate is placed.
- The closed tube is left for 14 days in a warm place free from drafts and sunlight.
These operations require sterility! Dishes and instruments must be sterilized, the contact of the substrate with the environment is excluded.
If too many spores got into the tube, or the temperature in the room was higher than normal, a mycelial crust may appear, then the operation should be repeated. Also, everything will have to be redone if a foreign smell appears and the surface is covered with moisture, which indicates that the substrate is infected with bacteria.
The finished mycelium looks like a white fluffy bloom and has the smell of fresh mushrooms.
Substrate preparation
 Unlike other summer cottage crops, mushrooms do not grow in the ground, therefore, with any growing method, it is necessary to prepare a substrate for oyster mushrooms at home. Hobbyists who are not serious about preparing the substrate then become disillusioned with the venture, not seeing the expected harvest. In fact, making a normal substrate is not at all difficult, you just have to study the rules for its preparation. Often used as a substrate:
- the husk of sunflower seeds;
- straw of wheat, barley, buckwheat and other cereals;
- hardwood sawdust;
- bran;
- tops of corn, reeds.
 Each of these materials can be used separately, or it can be mixed in any proportion, after crushing the fragments to a size of 0.5 to 3 cm. It is necessary that the material is dry, without signs of mold and has no unpleasant odor. For beginners, 10 kg of substrate is enough. It is prepared using the following technology:
- The mixture, crushed to the desired size, is poured with boiling water to destroy the harmful microflora. For greater reliability, some experts recommend boiling this mass for two hours.
- The steamed and mixed substrate is tamped in containers such as barrels and left to swell for 12 hours.
- The swollen mass is spread on a film with a thin layer for cooling.
You can check if the substrate moisture is sufficient, you can do this: squeeze it in your hand. If, at the same time, water does not drip from it, and the lump keeps its shape, then the humidity is normal.
Where is the best place to grow oyster mushrooms
 It is possible to breed oyster mushrooms at home both in basements and in greenhouses, sheds, chicken coops and other utility rooms, provided that the necessary conditions are created there.
Suitable conditions for growing oyster mushrooms are:
- humidity not less than 70%;
- air temperature from 20 to 30 degrees;
- excellent ventilation is required;
- artificial lighting.
 Next, you need to understand how oyster mushrooms grow at home. The basement or cellar of a private house meets these conditions in the best way. At the same time, the structure needs careful preparation and equipment. At the beginning, it is recommended to carry out disinfection: clean it of dirt, spray it with a sulphate solution, whitewash the walls and ceiling or treat it with copper sulfate. After processing, all doors and windows are closed for two days, then dried using ventilation.
A thermometer is needed to control the temperature, and it is recommended to maintain the humidity using irrigation or the use of a humidifier.
If the humidity is high enough, water should not accumulate on the surfaces, otherwise fungus may appear, which will have a detrimental effect on the harvest.
Another important condition is to prevent flying insects from entering the room, so all ventilation openings must be equipped with a mosquito net.
When growing oyster mushrooms at home, strong lighting is not required, just one 50-watt light bulb or fluorescent lamp per square meter is enough.
Growing oyster mushrooms requires a constant temperature, so a small heater is required in winter.
Growing process
 The easiest way for beginners to learn how to grow oyster mushrooms in bags. In addition to this method, there are others, for example, on stumps, in containers, in glass jars. Over time, new options appear, because the imagination of our summer residents is endless. The technology offered here for growing oyster mushrooms at home is considered the most affordable.
The next step is to prepare the blocks. Blocks are most often polyethylene bags (other containers are also possible) filled with a compacted mixture of substrate and mycelium. The bags are recommended to be disinfected in a one percent solution of bleach.
How to plant oyster mushroom mycelium in bags? Sowing of mycelium is done in a clean room, which is pre-sprayed with hydrogen peroxide, then ventilated. Clothes must also be clean, a hat and gloves are required. Before mixing with the substrate, the mycelium is kneaded into separate grains. In this case, the white color disappears, but there is no need to be afraid of this - the mycelium will remain. Stirring is carried out on a table or in a container.
How much mycelium is needed per bag depends on the size of the bag. The optimal width of the bag is 35 cm, it will take 300 grams of mycelium. The recommended packing density is 400 to 500 grams of substrate per liter of bag volume.
After filling, the bag is tied up - the block for growing oyster mushrooms at home is ready.
 Blocks are placed in the room in various ways, the most convenient is hanging on ropes, vertical or horizontal installation on racks is also allowed. The main thing is that the bags should be installed stably and could not fall over. In addition, you should avoid placing the blocks too tightly so that air can freely circulate between them.
Growing stages and modes
 The incubation period lasts two weeks:
- the temperature of growing oyster mushrooms during this period is maintained in the range of 19 - 23 ° С;
- air humidity should be 90 - 95%;
- no lighting is needed at this stage;
- airing at this time also should not be, because the carbon dioxide released by the mushrooms is necessary for their development.
After 4 - 5 days, a mycelium should appear in the form of a white cannon. After another 4 days, its color will change to brown, which indicates the maturation of the mycelium. This will fill the entire bag with white threads.
At the next stage of growing oyster mushrooms at home, you need a temperature of 10 to 16 ° and lighting for at least 8 hours a day. Holes are cut in the bags for growth on each square. m one by one. Hole diameter up to 5 cm.
 Further care is to water the bags with warm water once a day and ventilate regularly. To maintain high humidity in the room, in addition to watering, it is recommended to spray the walls and floor with water from a sprayer.
How many days does oyster mushroom grow? 10 days pass from the end of the incubation period to the first harvest. Some lightening of the hats speaks of the readiness of oyster mushrooms for collection. After another three weeks, the second fruiting begins, but it is significantly inferior to the first.
If you follow all the recommendations for growing oyster mushrooms at home, you can collect up to 45 kg of mushrooms per 100 kg of substrate in two periods.
How to grow oyster mushrooms in sawdust
 Growing oyster mushrooms in bags of sawdust is a more complicated method, but also more effective. The freshness of sawdust is of great importance, since pathogenic microorganisms can develop in stale ones.
Sawdust of coniferous trees is not suitable for the oyster mushroom substrate.
Sawdust must be dried to a moisture level of 7-10%, while they must be light, free-flowing and dry to the touch. There are few nutrients in sawdust; it is recommended to increase their content by adding beer wort. You can purchase it from a brewery or make your own.
Substrate preparation
Wheat or barley grains, washed in running water, fill any dish like a baking sheet with a layer no thicker than two centimeters. This layer is covered with cold water and left for a day and a half. After that, the liquid is drained, and the swollen grain is covered with cotton cloth. The fabric is kept damp, periodically watered. After two days, the grain will germinate. When the sprouts reach a length of 8 mm, the grains are dried in the oven at 60 ° C. You can dry it simply by spreading the grains over the table surface at normal temperature.
The dried malt is ground to a ground coffee consistency. Dilute with water at the rate of one part of the powder, five parts of water. This mixture is steamed in a water bath for an hour and a half, stirring occasionally. After steaming, the mixture is filtered through cheesecloth. The resulting wort contains a lot of sugar, is rich in vitamins and amino acids.
We start the process
Before filling the bags with sawdust, pasteurization is required. It is carried out as follows:
- Sawdust is placed in a bowl, poured with boiling water with wort at the rate of 200 g per 1 liter of water. The liquid should be three times more than the sawdust.
- The dishes are carefully covered and left for 8-10 hours. Then the excess liquid is drained.
The cooled substrate and mycelium are tamped into bags in layers.
The substrate and the mycelium must be at the same temperature to prevent steaming of the mycelium.
After 45 days, the bag is opened, cross-shaped cuts are made on the sides.After the appearance of the rudiments of fungi, watering begins and the lighting is turned on for 8 hours a day.
 Mushrooms ripe for collection are twisted, leaving hemp. The slots should be sealed with tape so that the moisture in the bags does not evaporate, and wait for the mycelium to appear. Then comes the second, and then the third wave of fruiting.
At first glance, growing oyster mushrooms at home may seem like a daunting task. But after carefully studying all the recommendations and performing this procedure for the first time with their consideration, you will gain valuable experience. In the future, all actions will already become familiar and will not cause difficulties. The resulting harvest will not only benefit and save the family budget, but also give you the opportunity to be deservedly proud of your work.