Do-it-yourself beautiful and reliable mansard roof
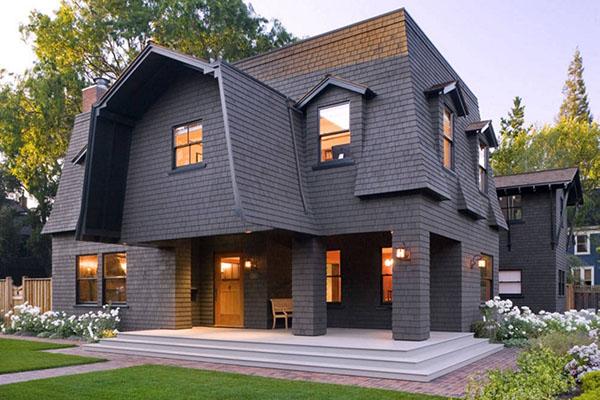
The mansard roof created with your own hands makes it possible to expand the living space without spending additional financial resources for this and without using the additional area of the courtyard. Living rooms with unusual shapes can be arranged under the roof canopy. Usually a gable roof with an attic is created for this. It allows you to achieve an ideal location for arranging living rooms.
Diy mansard roof: drawings
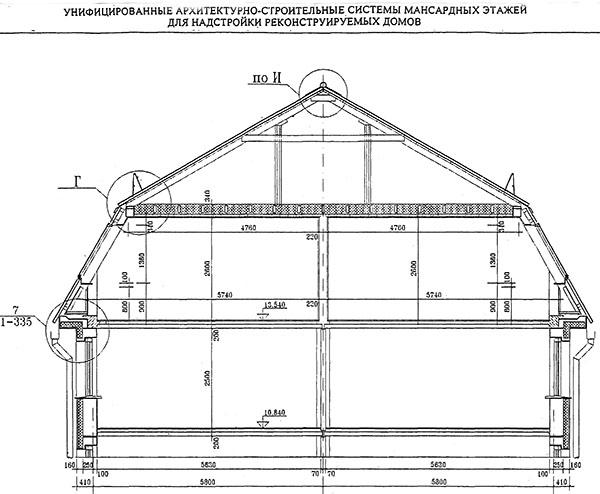
At the beginning of any construction, a drawing plan of the future structure is created.
The following points should be worked out in it:
- Types of rafters used. In a layered rafter system, the supports rest in several places on the Mauerlat in the lower part, and on the struts in the upper part. The pitched system is considered a classic one and is best suited for gable roofs. The structure is mounted inside, where the rafters are placed with an emphasis on opposite walls. The distance between the walls must be at least 6 m.
- Hanging rafters consist of two beams connected to each other at a certain angle. The beams are installed on the filly and abut against the Mauerlat. For wide spans, this system will not be effective.
- Ceiling height options. They must not be lower than 2.5 m. To achieve the height, the break line must be higher than 2.8 m, taking into account the thickness of the finishing materials.
- Thickness gender... The main load of the entire attic floor is on the load-bearing beams and the covering, therefore it is important to correctly calculate the floor thickness. Taking into account the load of wind and snow on the roof, the width is calculated by the following formula S = Sgхp, where Sg is the amount of snow cover, and p is the slope of the roof.
Drawing up a drawing begins with the choice of the shape of the roof, take into account the dimensions of the rafters and their number.
The project of the attic roof should be drawn up carefully, since any inaccuracy in the calculations will lead to deformation of the structure during its operation. You can more accurately calculate the parameters using computer programs. After the final verification of the data and drawing up the drawing, you can proceed to the construction of the entire structure as a whole.
We create a mansard roof ourselves
First, we decide on roof type... If your drawings indicate the rafter system of the attic roof, then its construction begins with the arrangement of the Mauerlat. It is carried out from boards or timber. The base is necessary to distribute the load over its area and transfer it to the side walls, and it is also on the mauerlat that the bases of the rafters rest. In fact, this is the foundation for the entire attic.

Metal studs are used to fix the Mauerlat bar. Fasteners, fixed in a concrete monolithic beam located at the top of the wall, hold the beams and connect them to the crown of the wooden wall.
When installing the support structure, surface waterproofing will be required so that moisture does not get on the wooden elements. Any waterproof material can be used as an insulator.
A secure fit ensures that your roof does not deform under heavy loads and strong winds. Therefore, check that the rafters are securely attached to the walls of the house.
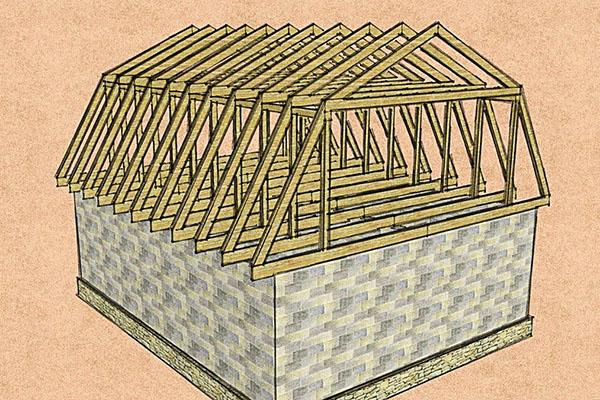
Do-it-yourself construction according to the drawings of a broken roof of the attic involves the installation of 2 types of rafter legs in the structure:
- Lower. Installed at an acute angle, combining rafters with a Mauerlat or specially designed cross supports.
- Upper. This part is installed on an arch system.
Before erecting the lower part, it is necessary to carefully calculate and mark the place of installation of the legs. Work begins with the extreme beams. The upper cut of the rafter legs should completely coincide with the edge of the board and fit snugly against it at an angle, and the lower one should rest against the Mauerlat.
Arrangement of a window opening
If the roof scheme involves a window in the attic roof, you should first decide what kind it will be.
Professionals distinguish several types of roof windows:
- Inclined to make the most of the sunlight. With this form of windows, changes in the roof structure are not required. When designing them, it should be borne in mind that due to significant loads, their area is limited and should not exceed 1.4m2... It is also worth remembering that in the summer, they contribute to overheating of the room, so they should be installed on the north or west side.
- Vertical. Installed on the roof ledge. They are resistant to heavy loads and do not differ from facade ones. Due to their design, they lose heat to the least extent.
- Front-line. The structure is installed on the roof at right angles.
- Speaker. This type of window structure can be installed on both flat and gable roofs. The easiest way is to equip it on a straight roof. The so-called birdhouse allows you to increase the area of the room and prevents heat loss.
To install the window, two transverse beams are mounted with the same cross-section of the rafter legs. If the corner of the attic roof, the upper beam is not installed; instead, a crate is attached.
Fixation is carried out using brackets, which are attached to the window frame on one side, and attached to the timber on the other. A drainage gutter must be installed above the window. It will not allow water to collect and moisture to enter the opening.
The width of the frame to be installed should be 4-6 cm less than the distance between the rafters.
When installing protruding windows, the geometry of the roof changes. Because of this, the complexity of the installation of the rafter system and the laying of the roof covering increases. Therefore, the easiest option is to install front windows. They do not require reinforcement of the structure; it is enough to install a high-quality glass unit.
Stages of erecting a mansard roof yourself
Do-it-yourself attic construction technology, using drawings and photos, is carried out according to the following scheme:
- installation and installation of the support;
- construction of a rafter system;
- installation of windows;
- laying the roofing cake.
The installation of the support structure begins with the installation of the support frame on which the posts will be attached. They should be located in clearly indicated places. The width of the gap between the supports should be the same as the width of the attic. U-shaped arched systems are installed first on the frontal zones of the structure. The cross-section of the beams for the racks should not be less than the diameter of the support.
Next, the rafter system is installed. At the beginning, the lower rafter legs are being installed. If the project provides for a roof with overhangs of slopes, then the cut of the lower part of the leg is made in a certain shape according to the type of roof. The lower part of the rafters rests on the support and is fastened with nails. In the places of connection with the Mauerlat, it is recommended to additionally strengthen the legs with fired wire.
If the house is higher than 8 meters, a ridge system is used. This design allows you to distribute the load evenly over the entire area of the frame. In the ridge system, additional racks are installed in the center of the fronts, on which the ridge bar is mounted.
It is necessary to accurately determine the height of the ridge.The angle of inclination of the upper rafters depends on this parameter.
The upper rafters are L-shaped. The bars are joined together end-to-end using a metal gasket. It is recommended to start by adjusting the legs of the upper rafters at the joints directly on the roof. The created structure can then be used as a template for preparing several trusses. In finished form, they are installed on the extreme racks and then go with a constant step to the end.
During the installation of the upper part of the rafters, if provided for by the plan, window openings of a certain type are installed.
The last stage in the creation of an attic roof is to install a crate, on which insulation and waterproofing materials are laid. Roofing material is mounted last on top. From the inside, the roof is covered with additional insulation and cladding is attached.
After the completion of the roofing, the construction of the roof is considered complete. In creating a roof with your own hands, you will not find difficulties for yourself. Given the information, having understood all stages of the installation, you will successfully cope with the task.
It is not so easy to build it with your own hands. Of course, it is advisable to think about the attic even at the stage of planning the house. During construction, I thought of making an attic, and not just a roof. Fortunately, adequate guys work in the mansion, they have agreed on an attic with them. The project was completed and completed. The house is frame, so technically it was quite possible