How to dress a rabbit skin yourself at home
 Many farmers think that making rabbit skins at home is very difficult. This is not entirely true: dressing fur does not require much effort on your part, but this process will take a long time. It takes 5 to 7 days to dress the skins, depending on the method of primary processing.
Read also the article: how to cook a rabbit delicious at home?
How to choose a rabbit skin for dressing
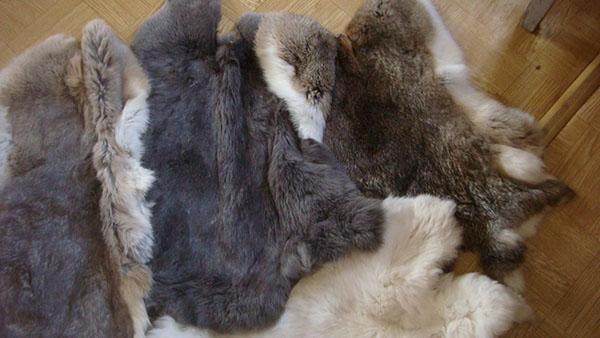
After the skin has been removed from the carcass, it must be turned inside out and inspected. If the skin is blue, then the rabbit was sent to the slaughter during molting.
When such a skin is fleshed, there is a risk of damaging the fur. Bald spots form on it, which affects the quality and price of the finished material.
Fleshing rabbit hide
 There are two methods of preliminary processing of the skin. In the first case, dressing begins 2 hours after slaughter. With this method, the skin and fur are dry, which makes fleshing easier.
The second method is fleshing after drying and soaking. With this processing technology, the skin is left for a day in a room with an air temperature of 24 ° C. Then it is placed in warm water, the temperature of which is 35 ° C, for 24 hours.
 If the fur is of high quality, then fleshing can be carried out 2 hours after slaughter, so you will save 48 hours. Processing of rabbit skins using the second technology is used if there is a lot of blue on them.
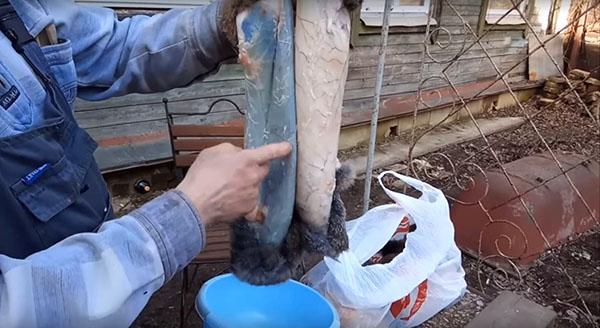
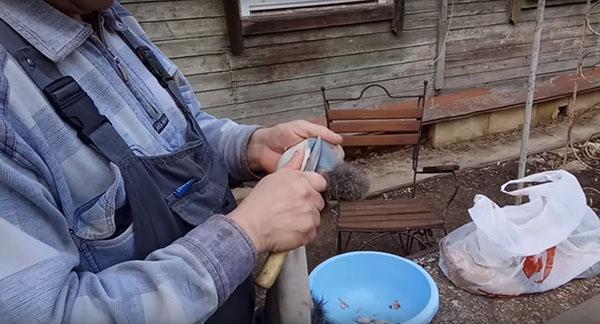
Use a kitchen or hunting knife for fleshing. It is not necessary to sharpen it, since it is easy to damage the dermis with a sharp knife.
You need to remove the remaining meat and fat, starting with the rump and moving towards the front of the skin. It is necessary to slightly cut the vein at the animal's paws and remove the film from the dermis by hand, simultaneously cutting the meat with a knife.
Stages of dressing skins
In addition to primary processing, there are several more stages of dressing the skin:
- washing and degreasing fur;
- pickling;
- tanning;
- lifting;
- drying;
- softening;
- grinding.
After fleshing, it is necessary to wash the fur and dermis in warm water at 38 ° C in order to dissolve the remaining fat. Add 10 g of washing powder and 10 g of dishwashing liquid to 10 liters of water.
Hand wash if the skins are blue or if you have torn the dermis during flesh. You need to wash it twice - on the fur, and turning the skins inside out. After washing, the skins should squeak, if this does not happen, the wash should be continued.
If the skins are of high quality, they are loaded into the washing machine for 30 minutes in Economy mode with the spin function. After washing, you can start pickling the skins.
Pickling rabbit skins
Pickling is an important stage of dressing. It is carried out to decontaminate the skins. To prepare a pickle solution you will need:
- 10 liters of warm water (38 ° C);
- 20 tablespoons of salt (50 g / l);
- 100 g formic acid (10 g / l).
Formic acid does not leave a smell on the skins and does not have toxic fumes, unlike acetic acid or sulfuric acid.
Formic acid must be added in two stages: half when preparing the solution and half - 2 hours after immersing the skins in the solution. Sulfuric and acetic acid are added to the solution in one step.
An antiseptic, such as furacilin, can also be added to the solution to prevent the formation of putrefactive bacteria. The skins are left in such a solution for a day, and then washed slightly. Pickling can be considered complete.
Preparation of tanning solution
To prepare a tanning solution, 500 g of salt and 30 g of chrome tanning agent are added to 10 liters of water. Such a solution can be replaced with a decoction of oak or walnut leaves (250 g of leaves per 1 liter of water). The broth is cooled to a temperature of 38 ° C, salt is added and the skins are immersed in it.
To neutralize the acid, add 4 g / L of baking soda 2 hours after the skins are immersed in the tanning solution.
After tanning, the skins are washed again and placed under a press for a day. Then they are dried in a room for two days with the fur outside, turned inside out and dried the dermis for three days. During drying, the gray areas of the dermis are manually stretched.
By the end of drying, the skin should be as hard as shoe leather.
Final stages of dressing
The next step in making rabbit skins at home is softening. To do this, each skin is treated with a solution of glycerin and water, which is prepared in a 1: 4 ratio. After wetting, the dermis is kneaded in the palms.
Use a spray bottle to moisten the dermis, repeat the procedure every 30 minutes for 1.5-2 hours.
Making rabbit skin at home is a simple but time-consuming process. The last stage of dressing is grinding. For this, sandpaper is passed over the skin.
For bleaching and better removal of pellets, the skin can be pre-sprinkled with chalk.