We make a solid, strong wooden gate with our own hands
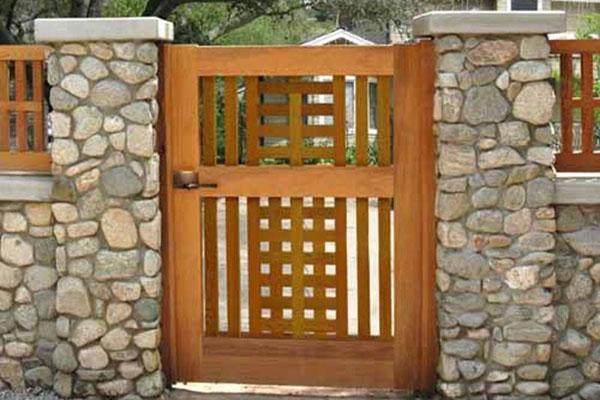 A do-it-yourself wicket made of wood is much cheaper than a custom-made product. Plus, it's pretty simple to make. If a person has the necessary skills and uses the tools correctly, the job will become even easier. Therefore, it will be useful to disassemble the technology of self-enclosing the site.
What tree?
The first problem arises at the stage of choosing wood. It is necessary to use the criteria of price and durability of wood. Good wood, when properly processed, gains increased strength and resistance to aggressive external environments.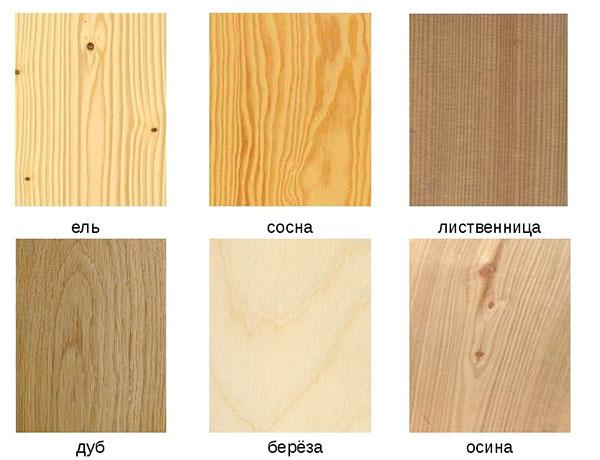
Among the types of wood, you need to take a closer look at the following:
- Pine. Often people choose pine, because of the high resin content, the wood is less subject to destruction, while the material is easily processed. However, the problem arises when covering a wooden gate with your own hands with paints and varnishes, because you have to look for compatible substances.
- Larch has a high degree of strength, but is easily processed with a plane and other tools. Lumber shops charge a high price tag on its timber, which frightens off many buyers.
- Cedar. The moisture-resistant structure of cedar is devoid of favorable conditions for the development of putrefactive bacteria, pathogens and molds.
- Oak. Of course, oak material has the best performance properties, but problems may arise at the stage of wood processing due to its high strength.
 There are other breeds, but not all of them are perfect:
- Aspen. Despite the slight complexity of processing and the preservation of the structure, aspen wood is rarely used when constructing a fence gate from wood with your own hands, since its strength leaves much to be desired.
- Poplar. If the sash is made from poplar, it is necessary to buy mostly dry boards. Losing moisture, wet material will cause deformation of the installed product.
- Birch tree. If you choose a birch, after a short amount of time, the cracked door in the fence will have to be replaced with a new gate.
Canvas construction
How to make a wooden gate with your own hands? There is one rather simple scheme. There is a rectangular or Z-shaped frame, which is the most reliable. Note that it will be better if in the middle there is another crossbar dividing the rectangle into two squares, which will increase the rigidity of the structure.
Wooden panels are nailed to the frame, which form the door leaf. There are two design options here:
- Deaf, where the sash consists of boards tightly fitted to each other, and the sheathing does not allow the formation of cracks.
- Through, where gaps that appear between the elements of the attached casing are found, as well as the brace parts preventing deformation of the product.
Which option should you choose? There are some important notes to keep in mind here:
- more wood is required for a blind wooden gate;
- closely spaced crossbars are bent when drying, as a result the whole structure will "go";
- the blind gate weighs more, so it will fail earlier;
- an accurate eye is needed to form a through web, since the gaps must be the same and even, otherwise the design will be ugly;
- a blank canvas is more suitable for decorative purposes, you can draw pictures on it, nail decorations;
- for safety reasons, choose a blind gate.
Preparation for work
Before starting work, you need to find and buy tools:
- screwdriver;
- roulette;
- plumb line;
- hacksaw;
- square;
- pencil.
All the necessary tools for building a wooden gate with your own hands are shown in the photo clearly:
Installation of pillars
This must be addressed first, since after work it may be found that the space for the wicket has changed. Therefore, if you do this last, then the canvas may simply not fit in size.
Please note that it is better to choose iron supports for both the gate and the fence. With wooden supports, the fence will quickly squint and become downright ugly. When installing ready-made poles, you will need sand, crushed stone and cement.
How to mount the supports correctly:
- First, they buy metal supports.
- The places of their digging are calculated. It is better to choose the distance between them a little wider than the sash.
- Under them, a drill dug holes about a meter deep. Please note that you should use a special tool, do not make holes for the supports with a shovel, since in this case the earth is loosened, and the gate quickly loosened.
- Then sand (about 5 cm) is poured onto the bottom and tamped.
- After that, rubble (5 cm thick) is poured into the pits in the next layer.
- Before immersing the iron pillar, it is treated with a blowtorch.
- The pillars are sinking.
- Their evenness is checked using a plumb line.
- If the pillars are level, then rubble is poured into the pits, and then they are poured with concrete mortar.
- Finally, the top of the posts is painted to protect against corrosion.
Assembly of the structure and cladding
How to put together a wooden gate with your own hands so that everything is smooth? The following guidelines will help you with this:
- First, assemble it without nails on the floor so that everything is level. Make sure of this with a corner and ruler.
- Draw on the wood with a pencil where all the boards are located.
- Remove any excess planks and leave only a rectangular or Z-shaped frame (whichever you choose).
- It is necessary to fix all the joints of the structure, for this you can put something on them or ask someone to stand at the corners.
- If the structure is securely fixed, then when knocked together, it will remain the same level.
- After assembling the frame, check again that the corners and lines are correct.
- Then slowly nail in the rest of the planks.
Take your time, this is a crucial moment, on which the beauty of the gate depends.
There are two methods of how to "put" the canvas on the bearing support:
- First, the hinges are nailed to the gate, and then the whole structure is nailed to the post.
- First, the hinges are screwed to the post, and then the door is nailed to them.
In general, both techniques are equivalent, each master prefers his own way. But we recommend the first technique, as it can be improved:
- In the passage you put a sturdy, non-wobbling block-stand made of bricks, a box, just pieces of wood and other improvised items.
- Put a wicket on it (already with hinges) and adjust everything so that it stands level, check it with a plumb line.
- Next, you screw the hinges to the support posts.
Do not forget to install a stop that will not allow the gate to open too wide. It is desirable that water does not accumulate at the gate; for this, the space under it is laid out with tiles.
A selection of photos of the design of gates for a summer residence: