Durable and handy DIY snow shovel
 In the winter season, on summer cottages or on the territory of a private house, a tool is needed to remove drifts and ice. A DIY snow shovel is perfect for these purposes. It can be made of any lightweight but strong material, the purchase of which will cost several times cheaper than a ready-made tool in a store.
Manufacturing features

In order for the inventory to have a long service life, it is manufactured in accordance with certain requirements:
- The tray must be strong enough to support the heavy load.
- To make the shovel slide easily over the snow, the bucket is shaped with a ribbed surface.
- The rubberized grip at the end of the handle will help prevent slipping in your hands.
- The length of the handle for a shovel should be suitable for a person's height, usually it is 1.5-1.8 m. The optimal length is up to the shoulders of the person who is going to use it.
- The length and width of the tray depend on the size of the person. For an average person, a scoop with dimensions of 50x50 cm is suitable.
 Also, do not forget about the angle of inclination of the bucket. The larger the angle, the easier it is to collect snow. But it will be harder to dump it. As a rule, an angle of 200 up to 250.
During the design of the structure, various modifications, such as a folding handle, should be avoided. Despite the convenience and practicality, its service life will be short-lived.
DIY snow shovel
A wide range of various household equipment is now available on the market. Materials of manufacture can be different, each of which has its own pros and cons. Before you make a snow shovel with your own hands, you need to decide what you are going to make the tool from.
Wooden snow shovel
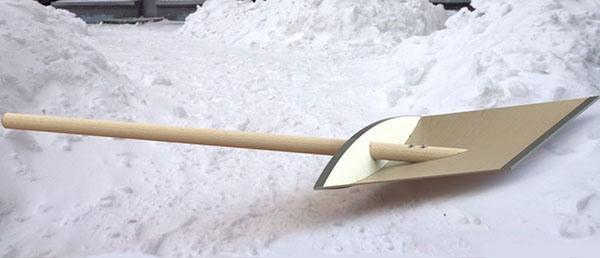
 Wood is a fairly strong and light material, but it is recommended to use it only when cleaning freshly fallen snow. A wooden snow shovel cannot cope with ice, but making it at home is simple and cheap.
The basis for the tool can be a sheet of plywood. The size of the scoop is selected individually, and the thickness should be 4-5 mm. You will also need a shank. It can be purchased ready-made or made from a bar with a section of 5 cm, trimmed with a plane.
Prepare the following tools:
- emery cloth;
- screwdriver and drill;
- jigsaw;
- self-tapping screws;
- nails;
- several strips of metal;
- primer.
This work can only take a few hours, depending on your skill.
You can start making a snow shovel from plywood:
- Saw a square out of the plywood sheet. It can be given various shapes, including a crescent moon.
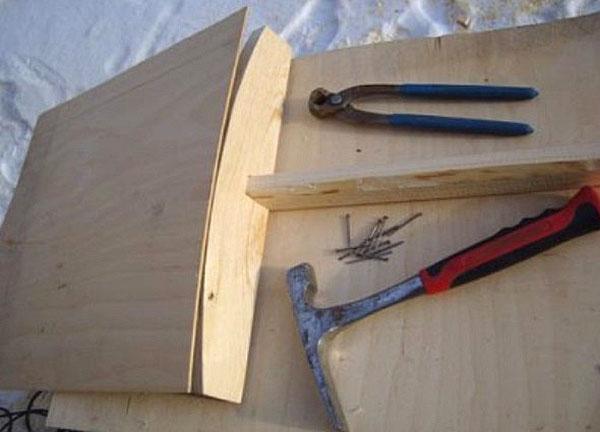
- Make a plywood holder. It must be cut lengthwise so that its width is 7-8 cm. Make the edges of the workpiece beveled to give it an arc shape.
- If you are not using a ready-made stalk, then process the block with a planer, and then sandpaper. In order not to damage your hands during work, you need to make the handle smooth.
- In the middle of the workpiece to secure the scoop, make an oblique hole that matches the diameter of the handle. This will allow you to secure the handle at an angle.
- Connect the shovel attachment and the scoop using nails. In this case, it is important to ensure that the connection is tight.There should be no cracks in the product, otherwise moisture will penetrate into the material and spoil it.
- Insert the handle into the hole. Screw the lower part to the base using self-tapping screws. It is better to pre-drill holes for them, as plywood can crack from twisting.
- To reinforce the shovel, use a 10 cm strip of aluminum or other metal. It is folded in half lengthwise and slipped over the edge of the plywood. Knock with a hammer and fasten the entire structure with nails.

- Another strip should be used to reinforce the joint between the scoop and the board. And the third strip is the joint of the handle and the base.
To extend the life of a hand-made shovel, prime the finished product with a primer. It will protect inventory from fungus, wood decay and adverse environmental conditions.
Metal snow shovel
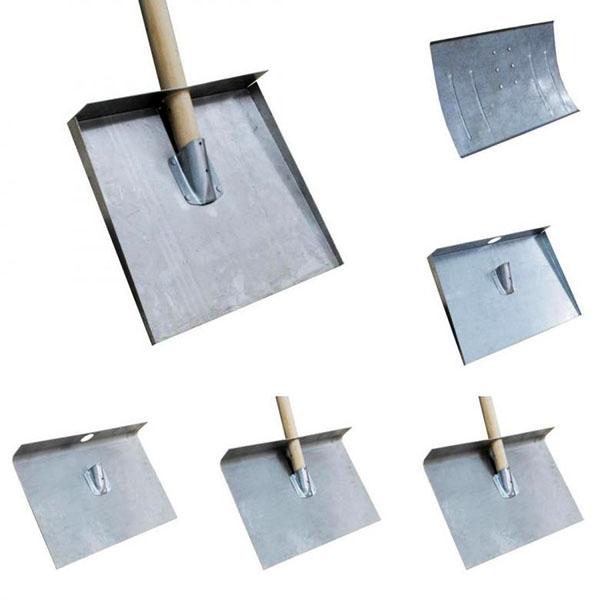
 Metal is a wear-resistant material with high strength and resistance to mechanical damage. The shovels do an excellent job with loose and wet snow and ice.
Prepare the necessary tools before making a snow shovel.
For the scoop, it is recommended to use galvanized metal and stainless steel, the thickness of which should not be less than 0.7 mm.
You will need a few metal strips, screws, bolts, a board, and a handle. The tools are as follows:
- screwdriver;
- drill;
- scissors for metal or grinder;
- spanners;
- plane;
- sandpaper.
Then get to work:
- You should start with the base of the inventory, because it sets the width of the scoop and the length of the parts to be fastened. To do this, use a prepared board, making one side semicircular. Make grooves for the metal strip on top. In the center of the base, drill an oblique hole for the handle.
- Cut a 40x40 cm canvas from a sheet of tin, sand the edges. Drill holes on one side. Use a metal strip to go around the scoop on the side where the holes are drilled. Bend the edges to a distance equal to the notches in the base. Drill the holes exactly over the holes in the scoop.
- It is possible to make a handle for a shovel with your own hands. To do this, remove the chamfer from four sides, then make it round and smooth with a planer. Saw the end of the handle at the desired angle and drill a hole for fastening with a bolt.
- Lay the prepared material for the bucket on the base and make a reaming. Screw it and the strips on both sides.

- Next, the tool is assembled. Insert the handle into the hole. In the place where it comes into contact with the scoop, secure them with a bolt. Drill a hole in the edge of the base and bolt the shank to it for greater reliability.
If you want to extend the life of your homemade inventory, open the wood parts with varnish or paint. They also use special substances to prevent the appearance of fungus.
Plastic snow shovel
 Plastic is durable. When stored for a long time, it will not rot or rust. In addition, the plastic shovel is lightweight, making it easy to use. The best option is to buy a ready-made scoop and attach it to the handle. The cost of products is low, and the range is wide.
Bend the plastic slightly to test its strength. If cracks and damage appear, then the material is of poor quality, and it is not worth buying a bucket.
 You can make a shovel for snow with your own hands using a barrel or canister made of plastic, the wall thickness of which is 6-8 mm.
This requires:
- Cut a square from a canister or barrel that will serve as a bucket.
- Screw the handle in the center of the base using screws and bolts.
- The connection can also be reinforced with metal strips or rivets.
There are many options for homemade snow shovels. They can be made from the materials at hand in no time. With proper operation, they will last more than one winter.The rest of the year is best kept in a warm and dry place.