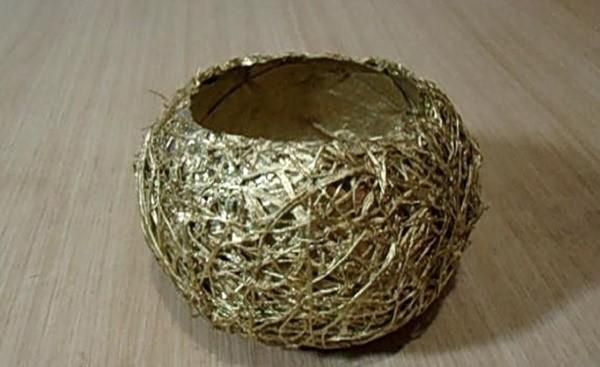
Making paper pots using papier-mâché technique
 If you are fond of homemade products, and at home there is a bunch of unnecessary waste paper, turn it into a useful thing. Literally out of nothing, you can make an original paper planter that will suit any flower. In such improvised flowerpots you can grow houseplantsas well as use for summer terraces.
What you need to make a paper planter
The main "ingredient", of course, is paper (newspapers, magazines, unnecessary notebooks). Several sheets should be left intact, and the rest should be cut into small pieces of about 10x15 cm.
In addition to paper for making pots you will need:
- balloon;
- a bowl or tray of plain water;
- PVA glue;
- scissors;
- a net for decorating flower bouquets;
- spray can of golden paint.
You can use paste instead of glue.
Paper pots: step by step instructions
The first step is to prepare the base of the pots. In our case, it will have a rounded shape due to the inflated balloon. How much to inflate is up to you. If there is a lot of paper, more can be done.
Now it's time to start directly manufacturing:
- Wet paper (the one that is intact) in water and glue the ball with it. The paper should cover it completely so that there are no holes. The exception is the top - it remains not pasted over, since this is the top of the future pots. It is desirable that the paper layer ends where the ball begins to taper. It turns out that you need to paste over a little more than half. The edge should be as even and uniform as possible along the diameter of the ball.
- On top of a continuous paper layer, glue the second layer of cut pieces, dipping each in glue.
- Allow the workpiece to dry completely.
- Repeat the procedure 3 more times, pasting in pieces. As a result, the base of the pots will be 5 layers of paper.
- When the last layer is dry, remove the ball by punching or blowing it off. Due to the fact that the paper is glued on water, the ball is easy to pull out.
- Gently press the bottom of the workpiece inside with your hands, forming the bottom of the planter. It is necessary that the craft takes a stable shape and does not turn over.
The base for the pots is ready, it remains only to decorate it. For this purpose, a net for decorating flower bouquets is perfect. It needs to be cut into pieces and pasted over with a glue gun. To make it beautiful, it is better to lay out several layers, laying the pieces of the mesh so that they overlap each other. You do not need to put a net on the bottom. At the end of the work, cut off anything that sticks out with scissors and trim the edges. And the final touch is the coloring of the paper pots. It will acquire a beautiful appearance and shine if it is painted from a spray can, for example, in golden color, in two layers.