Stunningly beautiful DIY topiary for yourself and as a gift
 How to make a topiary with your own hands and for what purposes to use it? What is the art of creating topiary and how to make your talisman correctly? Let's talk about this today.
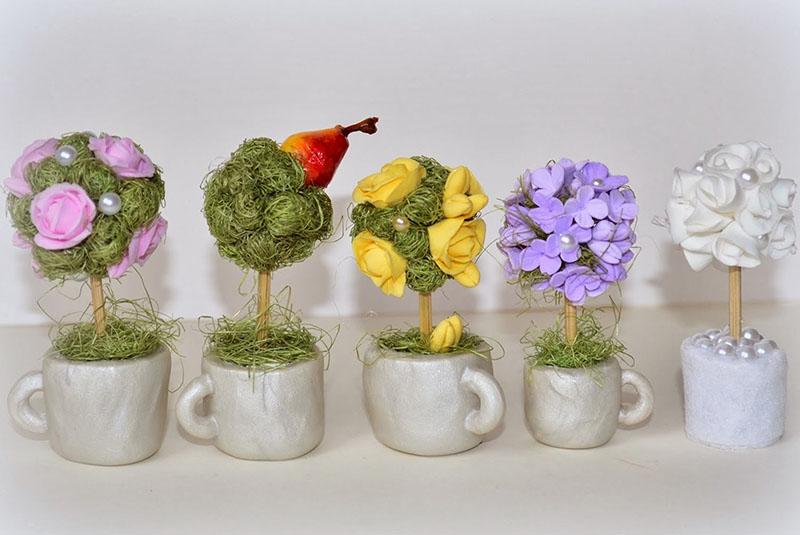
Even in ancient times, gardeners at the royal courts cut trees and shrubs, giving them the most unusual shapes, and it was these trees that were called topiary. Remember one of the wonders of the world - the Hanging Gardens of Babylon? In the modern world, the concept of topiary has changed and today these are small trees, artificially created by craftsmen from various materials. It is a decorative art and the result can be different. After all, everything depends on the imagination of the creator.
Topiary elements

No matter what materials you grow your magic tree, it consists of three parts:
- Crown. Depending on the fantasy of the master and the chosen theme, it can be cone-shaped, in the form of a heart, rectangular, round. Preference is given to foam blanks, which are purchased in stores for needlework and creativity. The original shape of the crown of the required size can be cut from a floral sponge. Crown of different sizes and shapes can be made of polyurethane foam. It is not difficult. Squeeze the foam into a bag and allow to harden. Then just remove the bag and cut with a knife to get the desired crown shape.

- Trunk. For a small topiary, you can simply use a pencil. To get a larger original trunk, use tree branches and flexible wire. Various threads, natural fibers, twine, decorative paper, stain or varnish are excellent for decorating the trunk.

- Base. Small glasses, cups or bowls are perfect for this purpose. pots made of plastic or ceramic. Jars of glass or tin are often used. When composing a composition of 2 or 3 elements, the choice is made on pots with a larger diameter. To create topiary, too low and wide or high and narrow containers are not suitable. The main requirement is sustainability.

To obtain an aesthetically beautiful topiary, it is necessary to observe the proportions of the width of the pot and the diameter of the crown. Ideally, the crown is 2-3 cm wider than the neck of the pot.
DIY topiary step by step
 If you carefully study the step-by-step instructions for creating a topiary with your own hands, you can learn how to make the most complex compositions.
General instructions for creating a topiary:
- First you need to decide what you are creating this talisman for. The choice of material and colors depends on the reason for which it is created. A tree of happiness for a wedding will look completely different from a topiary for a hero of the day.

- Preparation of material and tools. Choose the shape of the crown you like, a trunk made of branches or wire and a base of the required size.
 To decorate pots and collect topiary, it is necessary to prepare decorative elements, PVA glue, glue gun, awl, alabaster and a container for preparing the solution.
- Start making the crown.For this purpose, decorative vegetables and fruits, fabric or paper flowers, satin ribbons, pieces of organza are perfect. Beads made of plastic, glass or wood of different sizes look great in topiary. There are many options for decorating the crown and they all depend on the chosen theme and the imagination of the needlewoman. All parts are attached with a glue gun.

- Barrel mount. Rinse the branch chosen for a walk, remove the bark and dry it. Sand and varnish. Can be nicely wrapped with jute or satin ribbon. Make a deep hole in the crown with a diameter equal to the thickness of the trunk. Lubricate with hot glue and stick the trunk into the crown.
- Anchor the tree at the base. Dilute alabaster with water. Place the trunk with the crown in the chosen container and fill with the solution. Level the wood and hold until the mortar hardens. It will take a day for complete drying.

- Create soil. Close the space around the trunk with coffee beans, decorative stones, moss or sisal.

- Decorate the crown. The topiary is almost ready, but only a little remains - to give it sophistication.
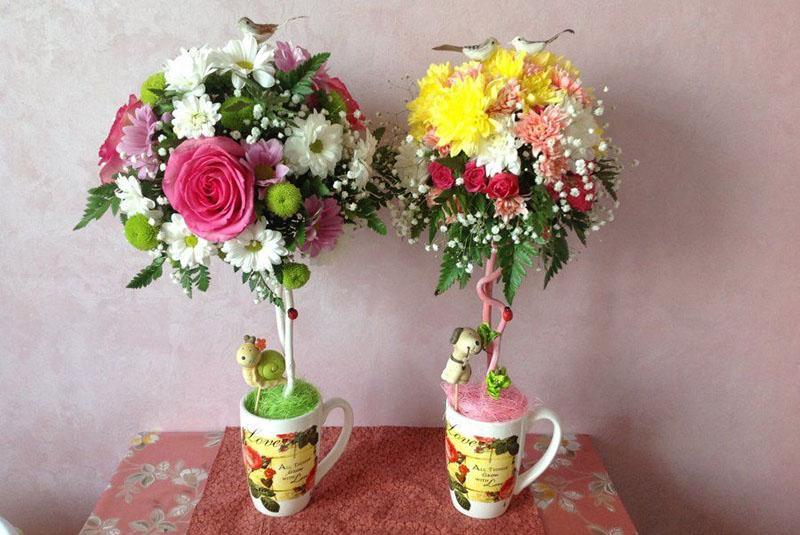
Figurines, decorative birds, beads, small bows and flowers are used for decoration.
Autumn topiary
 To make seasonal crafts, it is necessary to prepare in advance chestnuts, acorns, walnuts, spruce and pine cones, seeds of various fruits. All this is good to dry and hold until autumn. You can make a beautiful autumn topiary with your own hands from natural materials for the fall holiday in a kindergarten or school.
Introduce the child to the creativity. This is a great opportunity to be together and chat.
For crafts, choose a flower pot that matches the color of the fall theme. Use filler to make the structure heavier. The simplest base decoration is fabric.
 Use a real branch of a tree as a trunk. A thick branch with slight bends is best. First, you need to remove the bark and clean it with sandpaper. Paint a dry branch in a suitable color. For an autumn theme, a dark brown, bronze or gold trunk color is suitable.
The trunk with natural knots looks beautiful.
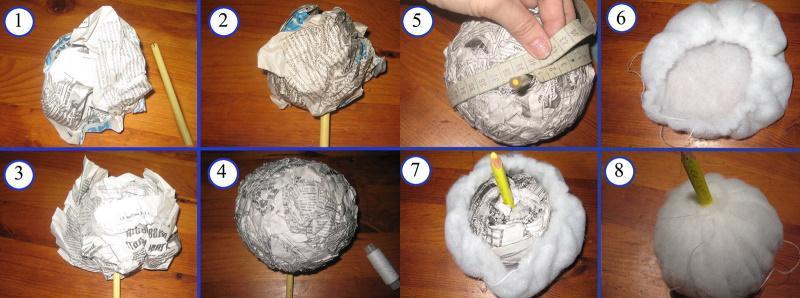
 For the crown of the topiary, purchase a foam ball of a suitable size in the store. Before work, it is advisable to wrap such a ball with twine. If you wish, you can make a ball of papier-mâché, polyurethane foam, paper or wool with your own hands.
As a filler for the base of the topiary, ordinary foil, pebbles of gravel, crumpled paper or sand are suitable. It will take more time to make crafts if you use plaster cast. However, this is the best option. Prepare the solution directly in the pot and immediately place the prepared stem. It will take up to 12 hours for the moisture to evaporate from the solution completely. After that, you can start decorating
First wrap the crown ball with yellow, orange or brown sisal. Use glue for fastening. Immediately outline the location for attaching the ball to the barrel. The first layer of decor will be nutshells or chestnuts. At your own discretion, materials can be left in their natural form or painted before starting work.
Now it is time to make a hole in the ball about the radius of the base, grease with glue and fix the crown on the trunk. Place the ball right away and let it stand for a while.
Next, decorate the crown with basic materials. To do this, use:
- sisal balls;
- Maple leaves;
- acorns;
- grape leaves;
- fruit pits.
DIY winter topiary for the New Year
 Usually, a beautiful elegant Christmas tree is placed in the largest room, and in other rooms there is little or no festive decorations at all. We offer to make small winter topiary so that the holiday is felt throughout the house.
Cover a small ceramic pot with white paint. Use polyurethane foam to fix the composition.In its appearance, it resembles drifts of snow. If desired, you can use New Year's tinsel to decorate the base.
Use glue to decorate the crown-ball with pine cones, candies, small Christmas balls collected in the forest or park. Apply gold or silver paint to the cones.
To easily remove the candies, use toothpicks to attach them
A beautiful New Year's mascot will last until next year, if you don't use candies when creating it.
From napkins
 A beautiful and completely inexpensive do-it-yourself topiary from napkins can be made quickly, even if you have never done it.
For crafts you will need:
- bright napkins - several pieces;
- foam ball for the crown;
- barrel stick;
- alabaster or gypsum for attaching the trunk in a pot;
- polymer glue;
- a glass or jar of coffee;
- scissors and stapler;
- for decoration narrow ribbons, pieces of lace, corrugated paper.
 Start making flowers. To do this, fold the napkin several times and fasten it with a stapler. Cut out the circles. Raise and crush each layer of the napkin to make lush petals. You need to make 20 flowers.

Paste the ball over with a napkin and leave to dry. Decorate the trunk with a ribbon. Attach the ball to the trunk.
 Using flowers and lace, dress up a dried ball. If desired, you can glue small beads into the flowers and plant several decorative butterflies.
 Prepare a solution of plaster or alabaster and plant the tree in a glass or jar. Align and wait until the solution hardens. Use corrugated paper and ribbon to decorate the glass. Around the trunk, you can plant several flowers from a napkin.
From coffee
 Fill your home with a pleasant aroma by creating a do-it-yourself topiary from coffee beans. So you will attract financial well-being and good luck to your home.
The coffee tree needs regular maintenance. Remove dust with a cool air blower or a soft cloth brush.
Manufacturing steps:
- Sort dry non-flavored coffee beans without any additives according to quality and size.
- Glue coffee beans in 2 layers on the crown prepared for work. Lay the beans in the lower layer with grooves down, in the upper layer glue the coffee with grooves up.
- Grains can also be used to decorate the base around the trunk.

- If desired, decorate such a tree with pearl beads, small bouquets of flowers or delicate butterflies. Wrap the wire barrel with a bundle. To decorate the topiary, you can use the symbol of love and tenderness cinnamon. She will also attract good luck to the house. Coins and dry orange wedges will help attract money.
- As a base, a thematic cup with an inscription and a coffee pattern looks great.

You cannot varnish the crown of a coffee tree if you want to get a fragrant souvenir. By applying several coats of acrylic varnish, you will prolong the life of the talisman, but there will be no longer the smell of coffee.
Satin ribbons
 It is very good if you have already learned how to make flowers from satin ribbons. This will help you quickly craft a wonderful talisman.
For work you will need:
- satin ribbon 5 cm wide in different colors - 6 m;
- barrel stick;
- beads, narrow ribbon and threads for decoration;
- pot for the base;
- superglue or glue gun;
- any basis for the crown (even a crumpled newspaper will do);
- glass stones to decorate the base of the barrel.
First of all, you need to make 15 simple roses from ribbons. The composition of satin ribbons of the same color looks good and the crown of roses of different tones looks original. Sew several beads into each rose.


If an old newspaper is used, then you need to crumple it well in the shape of a ball, tying it with thread for reliability. First, wrap the trunk with a satin ribbon, then use glue to connect it to the crown and fix it well in the pot.
It's time to attach the prepared roses to the crown.They can be sewn on or glued on. Straighten everything neatly and add decorative elements if necessary.
Place stones beautifully on the base around the trunk. The talisman is ready.
DIY sweet candy topiary

For work you will need materials:
- foam ball;
- wooden stick for the trunk;
- a beautiful pot for the base;
- candies in bright candy wrappers (300 g).
Manufacturing process:
- Paint the ball and the base of the topiary to match the candy wrappers.
- Decorate the trunk as well.
- Glue the candies onto the prepared ball.
- Attach the crown to the trunk.
- Place the wood in the base and fill with alabaster.
- To decorate the topiary, use beads, small flowers, glass stones.
 An arrangement of sweets is a great addition to a present for your beloved friend or sister.
A selection of photos of the most original and beautiful do-it-yourself topiary


