How to make a gate from a profile pipe yourself
 Any normal owner with a country house, dacha, land plot wants to protect his property from unnecessary prying eyes and encroachments on it. Do-it-yourself installation of a wicket from shaped pipes will be an excellent alternative to ready-made options in the construction market. In addition, the manufacturing process itself will hone your skills, and the resulting result will delight you for many years.
Why is such a gate so good?
- Ease of assembly and installation. The master may have low qualifications
- General availability and variety of shaped pipes
- The material is resistant to environmental influences
- Acceptable total cost
- The ability to create a unique design
Preparation for work and development of the drawing
 Before you start making a gate from a profile pipe, you need to decide on some nuances: selection of materials and tools, selection and marking of the installation site, development of a detailed drawing.
If you do not use a ready-made design and already have some experience in creating such structures, then you can immediately start marking the territory and drawing up a drawing. This can save time and resources.
List of required materials:
- shaped pipes for a frame with a cross section of 40 × 20 and more;
- pipes for supports with a square (rectangular) section of 60 × 60 and more;
- sheathing (made of wooden boards, solid metal sheets or corrugated board);
- self-tapping screws for fastening the sheathing to the frame;
- wicket hinges with mounted bearing;
- lock and handle;
- anti-corrosion agent, primer and paint;
- cement, sand, crushed stone.
You need to buy all this with a small margin of about 10-15%.
Required tool:
- electric drill and drills;
- grinder and cutting (stripping) circle;
- electric welding machine and electrodes, for example: ANO-2, OMA-4, MP-3 up to 2 mm;
- level, tape measure, goniometer, nylon thread spool;
- locksmith's hammer (with a square head);
- screwdriver or a Phillips screwdriver;
- shovel.
We turn to the drawing of the wicket and determine on it: the dimensions and section of the profile pipe for the frame and supports, the dimensions of the frame itself and the sheathing, the height of the wicket above the ground, the location of the hinges and the lock.
Try to be as accurate as possible in your calculations. A poorly designed drawing can result in a behavioral, asymmetrical frame.
The first stage is the installation of supports
 After marking the ground in the preparation process, holes are dug under the supports. Pre-purchased pipes for support pillars must lie in the ground at 1/3 of the total length (to be provided in the drawing). The pipes are treated with an anti-corrosion solution and leveled in the pit using a building level. The pits are filled with rubble and concreted with a mortar of sand and cement in a ratio of 3: 1.
After pouring, do not press on the posts for several days.
After solidification, loops are welded to the pipes. Priming and painting in progress.
The second stage is welding the frame
While the solution is solidifying, you can start making the frame of the wicket from a shaped pipe. On a locksmith's workbench or any other flat surface, the frame segments cut according to the drawing dimensions are laid out.Welding places are cleaned with a grinder, file or sandpaper. We place the segments in the intended structure and fasten them (preferably with clamps).
Next, you need to decide: we cook the frame on our own or hire a welder. For independent work with manual arc welding, an appropriate qualification is required.
In no case do not try to cook yourself if you do not have the skill. It is dangerous to health and life.
Welding is carried out in stages:
- The outer contour of the pipes is seized.
- The perpendicularity of the corners is checked with a thread and a protractor.
- The inner baffles are seized and checked again.
- All connections are welded reliably.
- The scale is knocked down, irregularities are cleaned.
There are enough videos on the network on the topic: "how to weld a gate from a profile pipe by yourself", but for the first time it is recommended to work in tandem with a specialist.
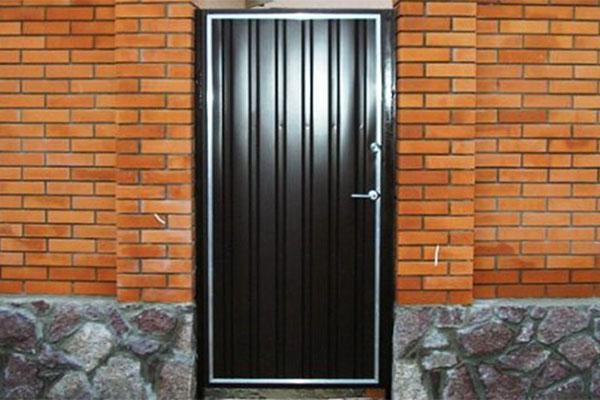
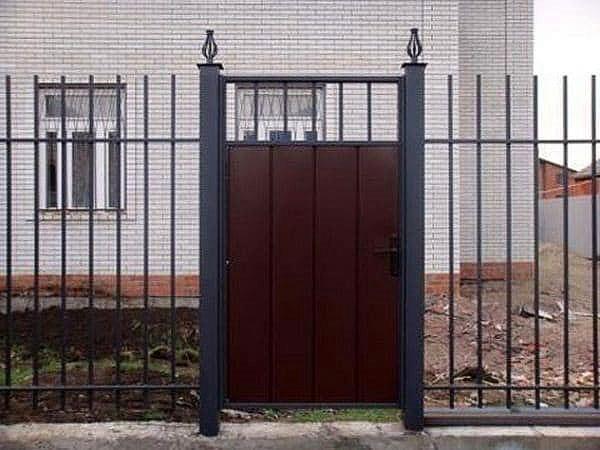
Loops of supports and gussets are welded to the finished structure. It is advisable to check the opening / closing of the frame on the supports. It remains to prime and paint the product with a spray gun. A similar frame of a wicket made of a profile pipe is shown in the photo.
The third stage - fastening the skin
If decorative elements are not provided inside the formed cells of the gate, then it can be sheathed with sheets of steel, wood, carbon panels, corrugated board and other materials.
To begin with, we mark the sheet we need by the size of the frame, and then cut it off with a grinder. Holes are drilled in the frame and the sheet fixed on it at an equal distance. Drilling is also carried out in gussets under the lock, and under the handle in the casing. Using a screwdriver and self-tapping screws, we pull the sheet to the profile.
The final stage is the installation of the wicket. After all the operations done, you can put the finished sheathed and painted gate on the hinges. We screw the lock to the kerchiefs and the handle to it.
That's all. Our self-made wicket gate from a profile pipe is ready.