We make a hanging hammock in macrame style
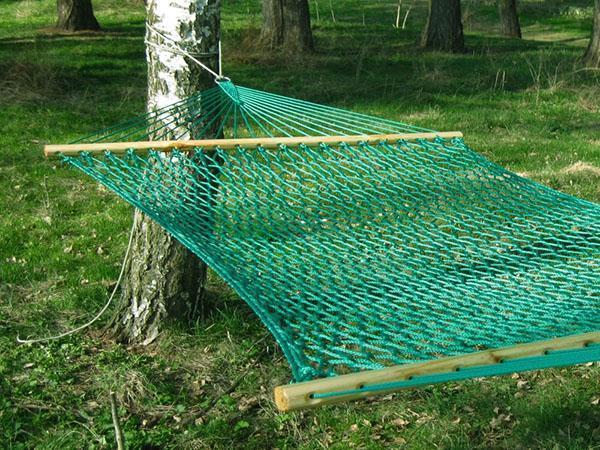 Summer relaxation in the garden always promises a real boost of energy. Especially such a weekend is remembered for a long time, if instead of a chaise longue - a hanging hammock, and as a cocktail - strawberry fresh. An openwork bed-swing made by your own hands will bring bright colors to this idyll. The length of such a bed will be 236.5 cm, and the width - 100 cm.
To knit an exquisite product for a family, the master will need 200 m of rope. Can be filled or not. Of these, 160 m will be on the canvas, and 40 m - on the stretch.
Read also the article: homemade fabric hammock - simple and fast!
Crochet for giants
The first step is to make a shuttle. To increase its size, use bamboo sticks. They are glued together and fixed with threads. The pin is made longer with a silicone tube. About 25 meters of cord is wound on the resulting part. This is enough for 8 rows. Two canes are connected, a starting loop is put on one of them.
Instead of a board, you can simply take a credit or telephone card.
The bottom line is that if a hanging hammock is planned with a width of one meter, then there are twice as many cells (1 m = 20 loops). It turns out that the leading row consists of 39 sts.The fabric is knitted, taking into account the basic rules:
- the connecting nodes are formed according to the principle of a manual seam "back needle";
- when tightening the loops, you should firmly hold the cross threads with your fingers;
- the tension of 3 ropes above the board should be the same;
- in the 1st and last rows there are 20 loops, and in all the others there are 19;
- for the convenience of work, the canvas is put on the tube;
- when the cord is twisted, it must be untwisted.
Weaving technology is best viewed on video. It shows how to properly hold the card and maneuver the shuttle. It is worth noting that each cell of the grid is done in three passes:
- first, a loop is put on the board, resting it against the cross weaving, and then connected to the upper cell;
- at the next stage, the rope is threaded through two threads;
- in conclusion, a knot is made in the manner of a "back needle" seam.
When the penultimate row is knitted, then one more loop is added at the end. In this case, the starting eyelet is cut off and burned so that it does not crumble.
Mount with Empire style notes
When the mesh is ready, you can start creating the bindings. They take a strong, rigid 50-centimeter cord (section - 1 cm). On the one hand, measure 5, and on the other - 10 cm, dividing the segment in half. This mark is wrapped with adhesive tape, cut off and burned, removing the film. The rope is connected into a ring, tightly wrapping the joint with threads. Then the remaining piece is tied to the joint.
Threads are wound in 3-4 layers, while at the edges they are made thicker. After that, super glue is poured into the middle, and also impregnated from all sides.
In the store, you need to buy a fastener called a thimble - a steel eyelet. It is placed on the opposite side of the winding, fixing it all with thread and filling it with glue. Then they make an openwork fastening. The principle is very simple:
- 10 segments of 2 m are prepared in advance;
- they are thrown onto the formed shaft;
- then the upper threads are crossed with the lower ones, while the extreme ones are passed between them, throwing them to the sides and carefully tightening.
After such a macrame master class, you will get a pretty triangle. At the end of the work, two cords should remain, which should be tied using a straight knot. Further, each axis is conscientiously pulled together. This mount is required in duplicate.
Spacers are made from ordinary shovel cuttings or plastic pipes. Holes are drilled on them at intervals of 5 cm.
More interesting than the Lego game
Assembling a structure is perhaps one of the most exciting activities. The spacer is suspended with ropes. At the ends of the threads, markings are drawn so that knots can be tied. All 10 cords are dipped into each hole. The marks are fixed with needles.
Now you need an overhead weight. The bottle is filled with water so that it weighs ½ the mass of the spacer, that is, 0.5 kg. It is tied with a boa knot. And at the end of the cable they attach a hook from a pin.
As a result, a bottle weight is attached to each rope. When it is pulled, a marker is made under the spacer with a marker. After the procedure, the pins and the bar are removed. The net is put on the handle, the warp threads are passed through the holes and tied to the openwork fabric in place of the marks. The excess is cut off, and the ends are melted. The edging cable is threaded around the perimeter of the hanging hammock, having previously connected it to the mount. The second side is made in the same way. The real work of art is ready for the garden museum.