How to build a greenhouse with your own hands
 The climate in Russia is not distinguished by long and stable warmth, therefore, it is customary to grow a significant part of the crop in protected ground. A do-it-yourself greenhouse built-in bread bin will become a reliable assistant when growing vegetables in any summer cottage from Siberia to the Krasnodar Territory.
Design features, varieties, advantages and disadvantages

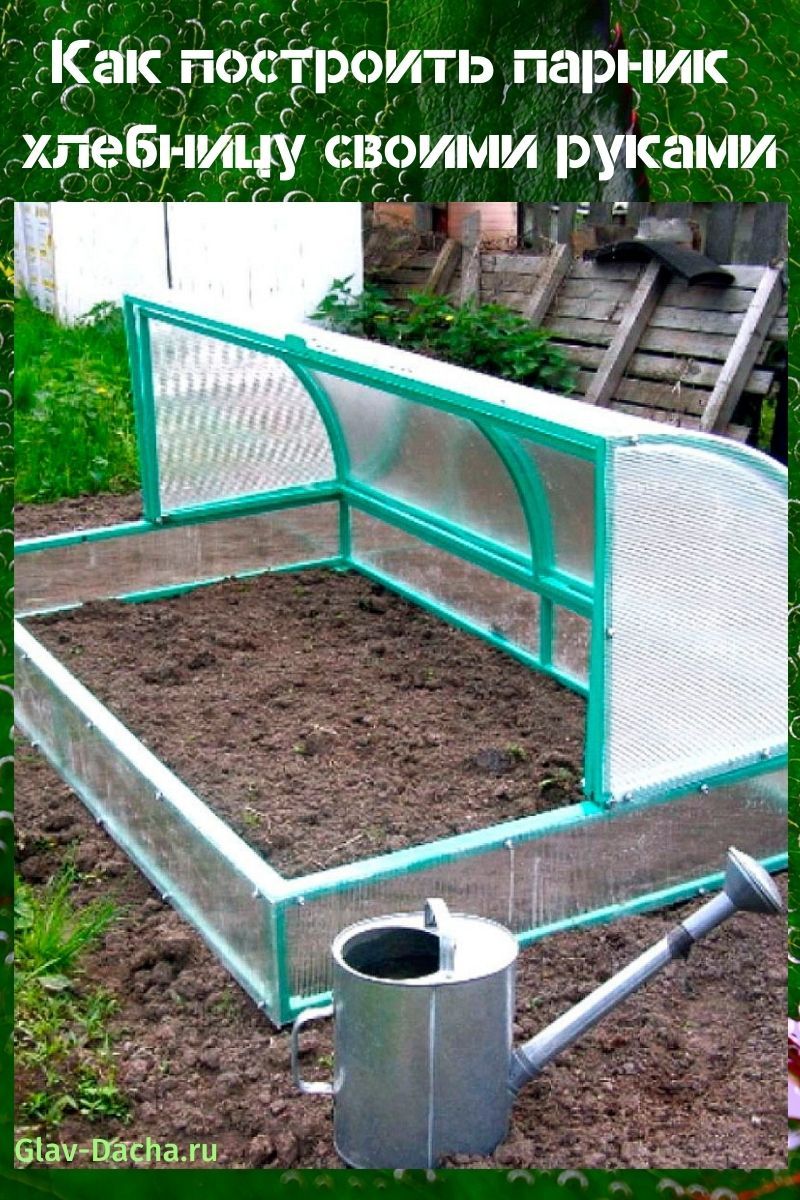
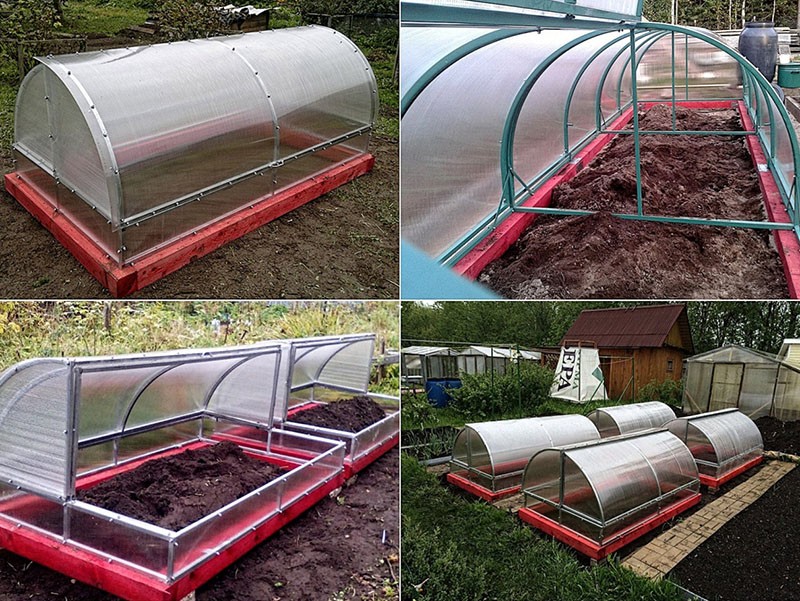
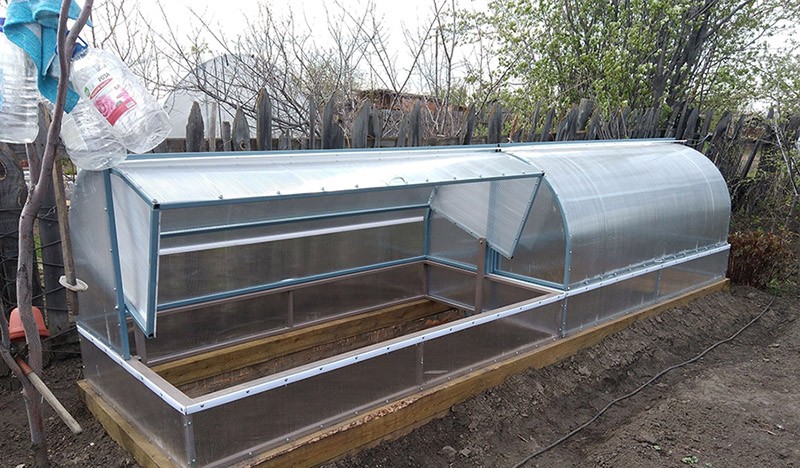
The greenhouse bread bin has several varieties:
- only one half opens, the second is deaf;
- both parts are movably fixed and rise;
- the walls are raised above the ground, forming a high bed.

 The first option is somewhat easier to manufacture, but assumes access only from one side. The simplified design is preferable for narrow beds or in cool, windy climates where end-to-end ventilation is not needed. In such places, the greenhouse is installed with the opening side to the south.
Two lifting parts allow you to approach the "bread box" from both sides, so the bed under it can be expanded. The fully opening design is advantageous in the southern regions - on a hot afternoon, both sashes can be raised, fixed and a covering material can be pulled over to protect the plants from the burning sun.
 In Fedorov's greenhouse, built with his own hands and according to his own size, they grow any low vegetable or berry crops - sweet peppers, eggplants, low-growing tomatoes, bush asparagus beans, cabbage seedlings, physalis, early greens. In the northern regions with a short summer in the greenhouse, zucchini, radishes, and low early-ripening tomatoes will have time to ripen.
The garden bread bin consists of almost the same pluses:
- fully working interior space that does not take up aisles;
- light weight allows you to transfer to another place;
- no need to disassemble for the winter;
- easy to ventilate.
The disadvantages of the greenhouse of the breadbox include the impossibility of planting tall plants and the need to monitor the state of the moving mechanism. From time to time it needs to be cleaned of dirt and lubricated.
Do-it-yourself greenhouse bread bin - stages of construction
 The construction of a new house for plants will not be difficult, if you mentally imagine its structure - two quarters of a cylinder cut along, nested into each other and fixed on a frame. The inner part differs from the outer one in smaller dimensions.
The greater the difference between parts, the greater the gap between them. A smaller gap will make the building more airtight, a larger one will improve air circulation in it.
A drawing with the dimensions of a greenhouse for a bread bin must be stocked up in advance in order to calculate and purchase the required amount of building materials, choose a suitable place on the site and make a foundation.
To make a greenhouse that opens on one side and measures 2x1.2x0.6, you will need:
- shaped pipe 20x20x1.5 with a total length of 19 m;
- polycarbonate sheet 2.1x3 m;
- bolts, nuts, self-tapping screws with thermal washers, primer and paint for metal.
Required tools:
- welding machine;
- angle grinder (grinder);
- drill;
- screwdriver or screwdriver.
If the building will stand on a foundation, it is necessary to additionally stock up on cement, crushed stone, sand and formwork boards.
Choosing a place on the site
 Even new polycarbonate partially blocks the sun's rays, so to build a greenhouse "bread bin" with your own hands, you should choose a place that is not shaded by buildings or trees. If it is problematic to choose such a place, you need to choose one that is well lit in the first half of the day. In the morning, plants produce chlorophyll more actively.
A slight slope for a greenhouse is not terrible, but with strong elevation changes, you will have to spend money on building a foundation.
If the entire area is on a slope, place the greenhouse at the top points. In the lowlands, the air warms up worse.
Foundation
 Typical drawings of a greenhouse for a bread bin usually do not provide for installation on a foundation. It is a lightweight and relatively flexible structure that does not suffer from freezing and thawing of the ground.
The foundation is needed only in two cases:
- high level of groundwater flowing to the surface during flood;
- location of the site on the slope.
To build a simple strip foundation dig a trench 20–25 cm wide and up to 40 cm deep. The bottom is leveled, covered with a layer of sand, tamped. On light free-flowing soils, formwork is made (on dense wet clays, you can do without it). Then concrete is poured, after setting, covered with a film and left for 2-3 weeks until complete hardening.
Simultaneously with the pouring of the foundation, fasteners for the greenhouse frame are embedded in the concrete. It is immersed in an uncured solution, leaving a working element on the surface - a bracket, hairpin or bracket.
If the plot is dry and level, and you don't want to put the greenhouse directly on the ground, provide a base from a bar in the drawing of the greenhouse "bread bin". To prevent decay, the tree is impregnated with bioprotection, drying oil or working off.
Another practical option for fixing a greenhouse on a garden bed is arcs that are elongated at the corners. They are dug into the ground up to polycarbonate. This design is cheap and durable.
Frame
 The construction of the frame begins with the end parts. Of 4 pipe sections with dimensions of 2x600 mm and 2x570 mm, 2 right angles are welded.
The length of the arcs is measured by the formula for the circumference - 2πR. The result is divided by 4, since the arc takes up a quarter of a circle. In our case, you will need 3 arcs 942.5 mm long and 3 arcs 894.9 mm long. To turn a straight pipe segment into an arc, you need a pipe bender.
You can use the simplest home-made device of two shafts located on the axes freely and one rigidly fixed to the handle. The distance between the shafts is selected so that the pipe passing between them bends at the desired angle.
Long arcs are welded to the outer part, shortened ones to the inner part.
Then 2 pipes of 2000 mm and 2 of 1940 mm are cut off.
Sections are welded together according to the figure:
After welding, the smaller part is tried on to the larger one - they must fit into one another, without touching, exactly according to the dimensions of the greenhouse drawings of the "bread box". At the tops of the right angles at the ends, holes with a diameter of 8.5 mm are drilled with a drill to fasten the parts. The welded frame is cleaned of scale, primed and painted over with a metal composition.
Covering the frame with polycarbonate
A sheet of polycarbonate is cut with a construction knife according to the following scheme:
They are screwed to the frame, starting from the side parts. Polycarbonate is attached to the inside with self-tapping screws with a press washer; for the outside, roofing is suitable. Then the polycarbonate is screwed to the longitudinal sides. The covering should cover the ends of the sidewalls so that moisture does not get into the material.
For a greenhouse in which seedlings will grow, choose polycarbonate with a protective layer from ultraviolet radiation. Under such shelter, young plants do not suffer from sunburn.
The outer and inner parts are connected with a gap, the width of which is fixed with washers.From the inside, two nuts are screwed onto the bolt so that the unit does not loosen during operation.
1-2 latches are mounted in the center of the long sides to fix the upper position of the opening part.
If the gap is too wide, attach a strip of rubber of a suitable size along the upper edge of the larger part. It will close the gap and clean the polycarbonate during the opening of the sash.
 The structure is installed on a foundation and fastened at several points with anchor bolts or other provided fasteners:
On this, the construction of a greenhouse "bread box" with your own hands can be considered complete.
Practical tips for use
Several "folk tricks" will help increase the functionality and usability of the new building:
- Arrangement of a warm bed will create a natural heating of the soil and allow you to plant crops earlier. To do this, inside the greenhouse, soil is taken out on two bayonets of a shovel and covered with small branches, foliage, compost.
- If brushes are attached to the frame of the non-opening part, the polycarbonate will be cleaned every time the sash is opened.
- The open sash must be fixed with a latch or latch, so that under a gust of wind it does not fall spontaneously and does not hit your hands.
If you provide the listed subtleties, all the questions of how to make a greenhouse "breadbox" with your own hands will be exhausted, and it will be convenient and safe to use it.